Jump to Video
The WPFront Notification Bar plugin is a tool for creating a temporary banner or button on your website to inform website users of an immediate but short-lived happening, such as a closure due to weather.
For more information on plugins in general, see the “Website Plugins” post.
This tutorial will cover:
WPFront Notification Bar in Plugins
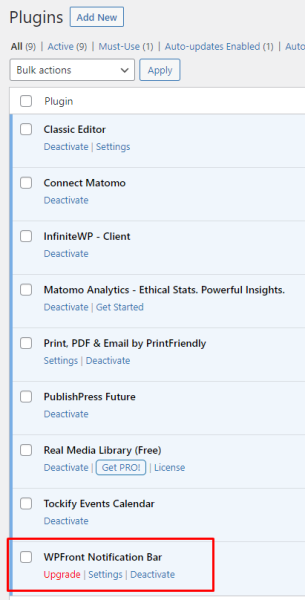
The WPFront Notification Bar allows you to create a message that displays in a banner about an immediate, short-lived event like a weather closure. To see if you have the plugin installed, click on “Plugins” in the left-hand black menu bar on your WordPress dashboard.
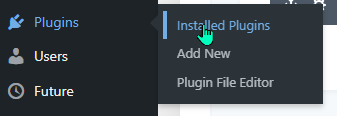
If you do not see this plugin, see “Installing a new plugin” for instructions.
WPFront Notification Bar Setup
To access the WPFront Notification Bar settings, hover over “Settings” on the lefthand side of the WordPress dashboard and click on “Notification Bar.”

Checklist of One-Time Setup
For a complete glossary/description of all settings, see WPFront Notification Bar documentation.
You may need to play around and customize settings for your own website, but these are general “best practice” settings for most websites. Once these are set they don’t need to be changed each time.
Section 1: Display
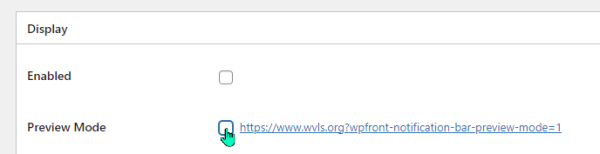
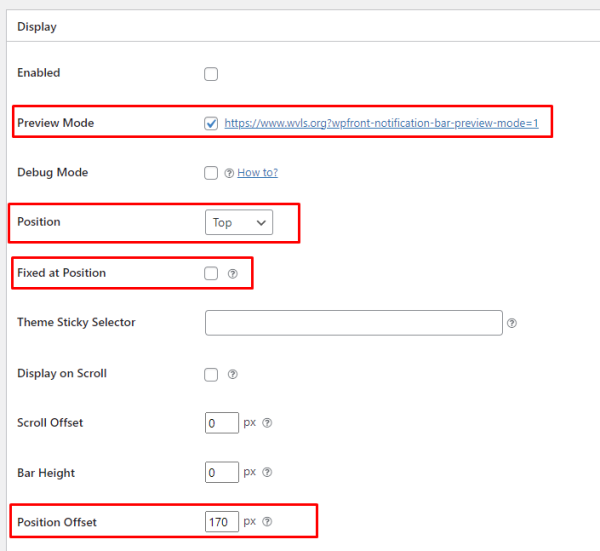
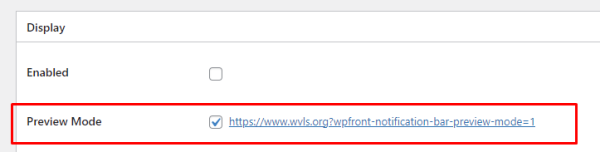
- Preview Mode – checking this will let you see what the bar looks like before it goes public. Check this box, uncheck “Enabled” and it will only appear as a preview for you. When you check this box and click “Save,” a handy preview link will appear net to the box – clicking on this will open your website with the preview of the notification bar.

- Position: generally choose Top.
- Fixed at position: makes the bar “sticky” and will stay in place/visible as the page is scrolled – only works when the Position is set to Top.
- Position Offset: moves the bar down from the top of the page a set number of pixels to avoid the bar being hidden under a menu. Due to responsive nature of website, you should check how it appears on several browsers/devices/screen sizes. Adjust the pixels to keep it as close to the top as possible, but least likely to be hidden on loading or after scrolling. I found 170 px to be a good starting point but your mileage may vary.
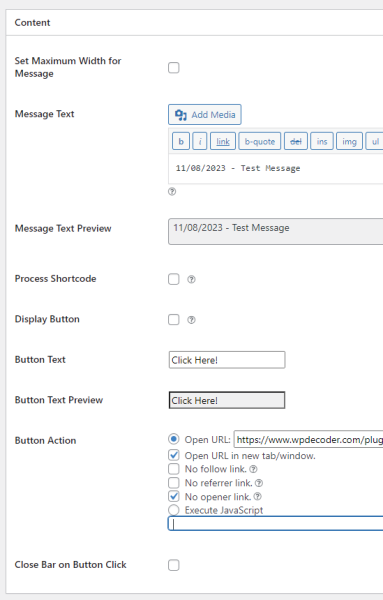
Section 2: Content
Leave all the check boxes (Set Maximum Width for Message, Process Shortcode, Display Button, Close Bar on Button Click) unchecked.
Return to Message Text when you’re ready to use the notification bar.
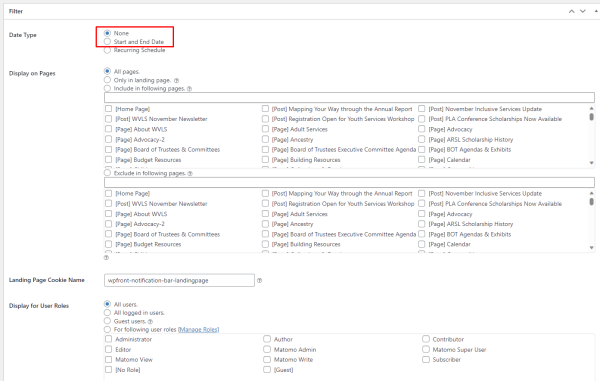
Section 3: Filter
For most cases leave all of these settings as default other than Date Type.
- Date Type:
- None (requires web manager to manually remove the notification bar after the event)
- Start and End Date (starts and removes the bar automatically)
- Display on Pages: All pages
- Landing Page Cookie Name: default
- Display for User Roles: All users
Section 4: Color
This is not an area where you want to try to match your theme. You want a notification bar that will immediately grab the website visitor’s attention.
High visibility schemes include:
- Black on Yellow
- Black on Orange
- White on Dark Blue
You can use a contrast checker to test your own color choices, but for this tutorial I’m going to suggest Black (#000000) text on Yellow (#fad000) bar (with no fade) as a best practice. (Unless you have a lot of yellow in your website’s theme – then another contrasting color may be a better choice.)
Note: the reason there are two color options for “Bar Color” is to create a fade/spectrum effect. Keep the same color in both places for a solid color bar – again the best for high readability.
Also note: these best practices do not include formatting a button, but similar high-contrast recommendations apply.

Section 5: CSS
No CSS is necessary for this plugin.
Save changes
Make sure you save your work.
Adding a message to the WPFront Notification Bar
Once you have your WPFront Notification Bar settings set, you can add text to Message Text in the Content section and preview your work.
Adding Message Text
To open the WPFront Notification Bar settings, hover over Settings on the lefthand side of the WordPress dashboard and click on “Notification Bar.”
This will open the WPFront Notification Bar settings – most of this should have already been pre-set during initial setup.
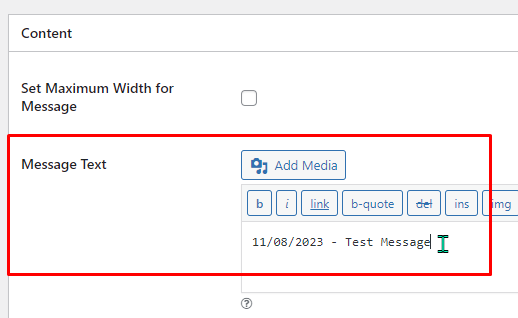
Scroll down to the Content section.
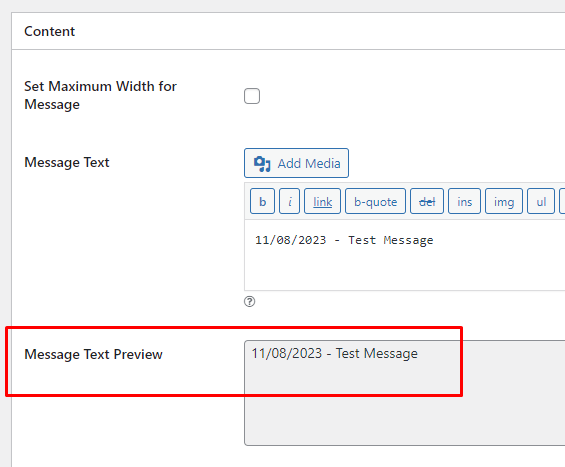
Type your message into the box that says “Message Text.”
When you click “Save Changes,” a preview of your text will appear in the Message Text Preview box:
Previewing your Message
If you have Preview Mode enabled in the Display section at the top of the settings, your notification bar and message will appear on your webpage when you open it in the same browser you are using to edit your page.
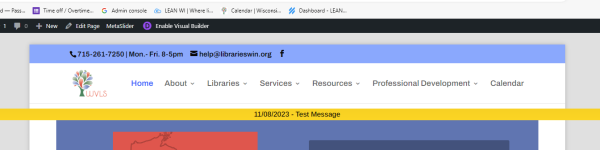
Note: this will NOT appear to the public on your website. For the public to be able to see this, you must check “Enabled” under Display.
Activating the WPFront Notification Bar
To make your notification bar appear publicly on your website, you need to do these things:
- Add a message to the Message Text box in content settings
- Either select “None” or set a “Start and End Date” under Date Type and make sure “All pages” is set under Display on Pages in the Filter settings.

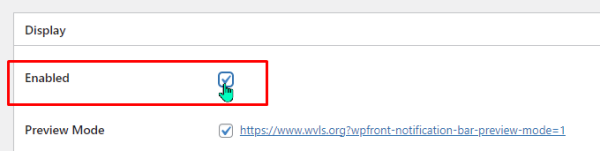
- Make sure the Enabled checkbox is checked in Display settings.
- Save changes
Removing the WPFront Notification Bar from your Website
When the event needing notification is past, you can easily remove the bar from your website with three steps:
- Open the WPFront Notification Bar settings by hovering over Settings on the lefthand side of the WordPress dashboard:
- Unchecking the box next to “Enabled” under the Display settings:
- Save changes
And the bar will no longer appear on your public website.
Note: if you have “Preview Mode” enabled, the bar will still appear on your website in the browser when you are editing your website. To remove this preview, simply uncheck the box next to “Preview Mode” and be sure to save your changes.