Jump to Video
A “plugin” is an add-on feature that adds additional functionality to WordPress and the Divi theme. WordPress is an open-source internet content management platform – essentially your basic kitchen table. Place settings and decorations beyond your basic plate, fork, cup are added through a theme or plugin that are often created by third-party developers (like going to a department store and getting that fancy new kitchen gadget that didn’t come with the house).
Plugins add a world of functionality and cool features to a website. But a word of caution – because plugins come from 3rd party developers, not all plugins are created equal, are equally well-developed or well-supported, and functionality may not cover all versions of WordPress.
Also, plugins are usually where the finger is pointed when something goes wrong with a website. Plugins and themes are the primary source of website compromise by bad actors. If your website suddenly doesn’t want to load or glitches or straight-up crashes, the first step is always to disable plugins – so the more you have, the more you are inviting the risk of problems.
Topics in this tutorial:
Installed plugins
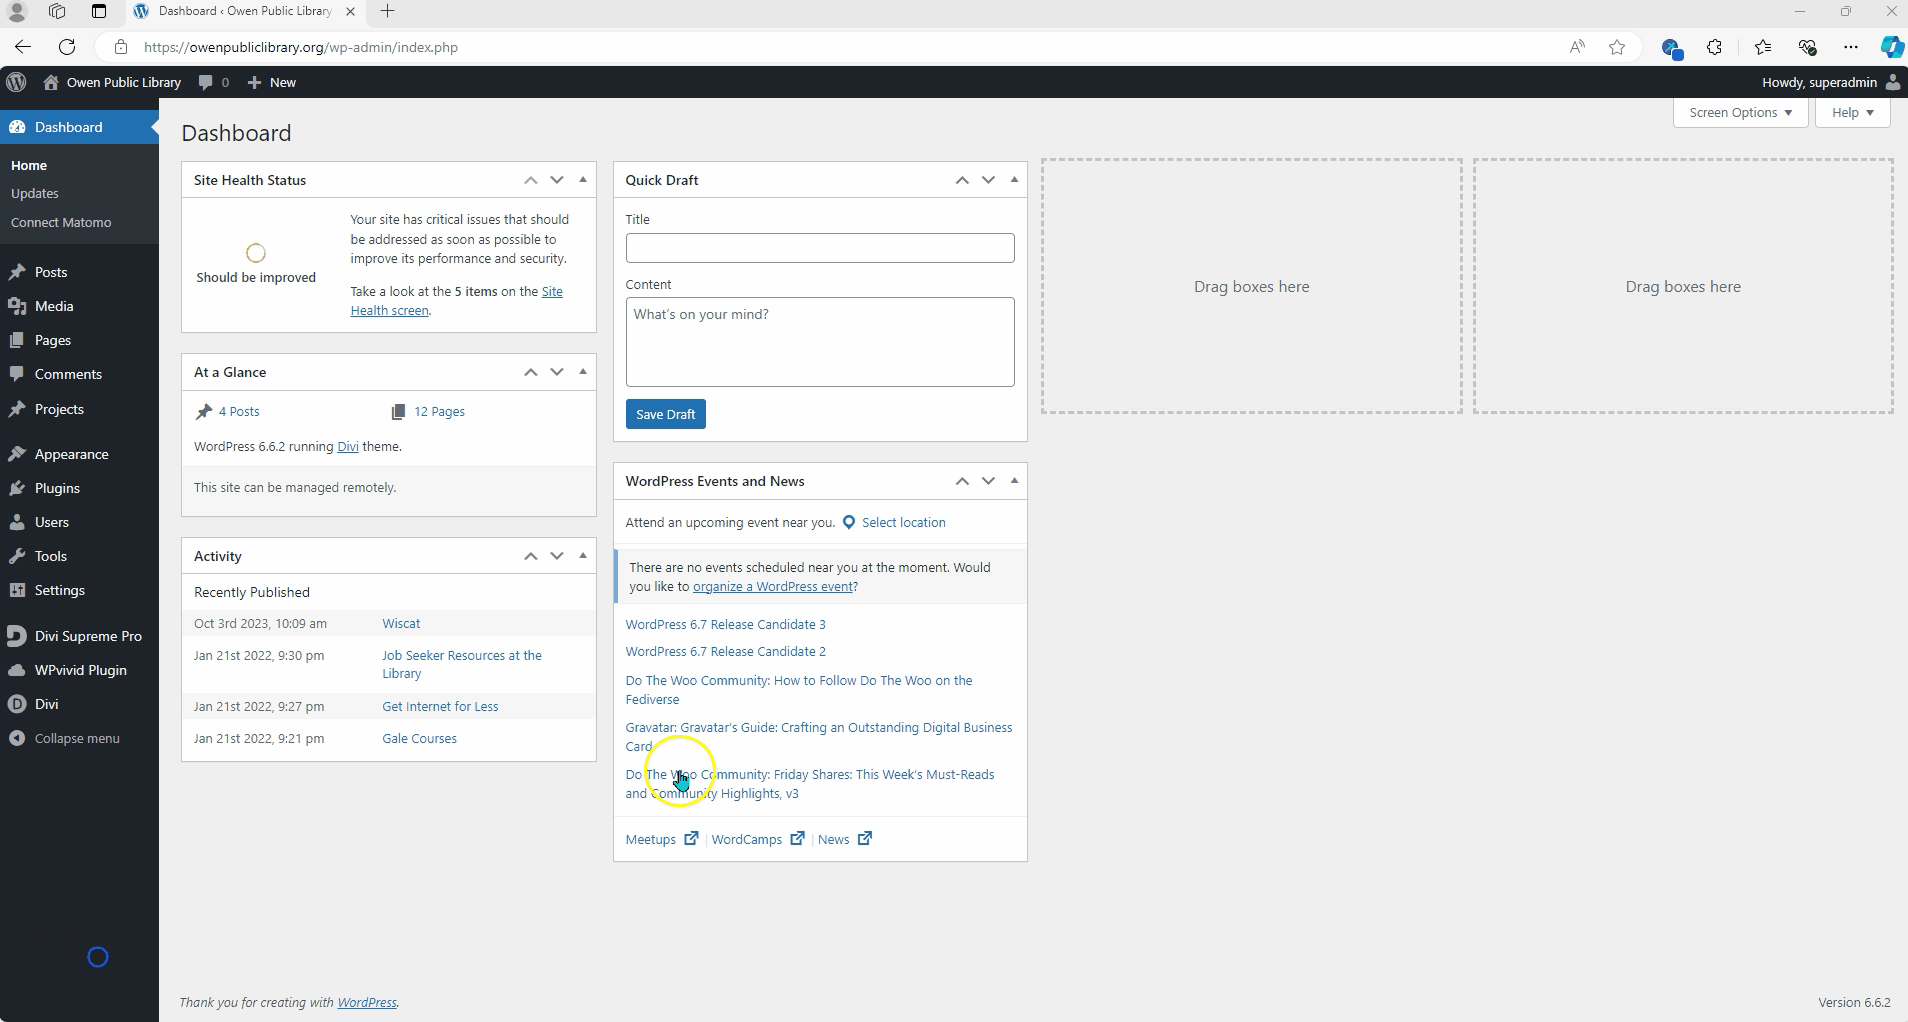
WordPress offers a connection to a catalog of themes and plugins through the main dashboard. To find which plugins you have installed, hover over “Plugins” on the lefthand side of the screen and click on “Installed Plugins.”
This will show you a list of plugins already installed on your website.
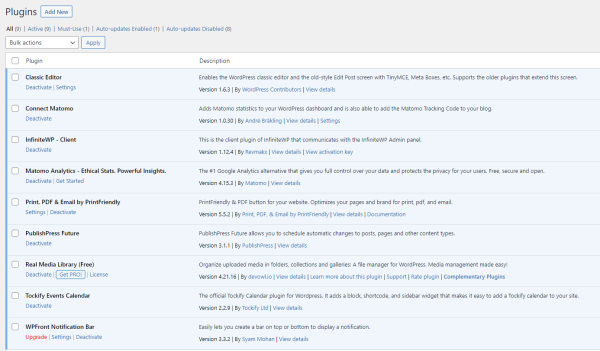
Plugins that might already be installed on your site by Libraries Win website staff include:
- Embed Code – Insert Header & Footer code
- Infinite WP
- Matomo statistics (one of several Matomo options)
- PHP Compatibility Checker
Good, secure plugins are updated and patched regularly. Most plugins will be set to auto-update across sites, but a few require manual updates. If you see a notification for an available update when you log into your website, please install it.
LEANWI Website plugin guidelines
Due to the potential security and website stability risk posed by compromised or unsupported plugins, always follow these guidelines when managing plugins on your website:
- Only install approved and supported plugins.
- Click here for a list of currently supported plugins.
- If you feel your website needs functionality not provided by one of the standard plugins, email websitehelp@librarieswin.org and we will review a proposed plugin or research a solution together.
- Ensure plugins and themes on your website are always up to date.
- While most plugins are set to auto-update, a few do not have this option. If you log into your website and see an update is available, install the update.
- Deactivate and remove plugins you are not using.
- Even if a plugin is on the approved plugin list, if you are not using the function, consider deactivating and removing unneeded plugins.
- If you have questions, ask.
- We are always happy to help – email websitehelp@librarieswin.org.
Adding a new plugin
Selecting a New Plugin
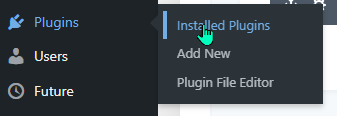
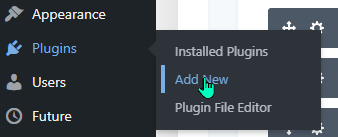
To add a new plugin to your website, begin by hovering over “Plugins” in the lefhand menu bar and clicking on “Add New.”
This will bring you to the WordPress plugin catalog page.
Generally you should begin by searching for a plugin that has been recommended by Libraries Win website staff. Recommended plugins list can be found here: https://training.librarieswin.org/website-101/plugins/#approved-plugins
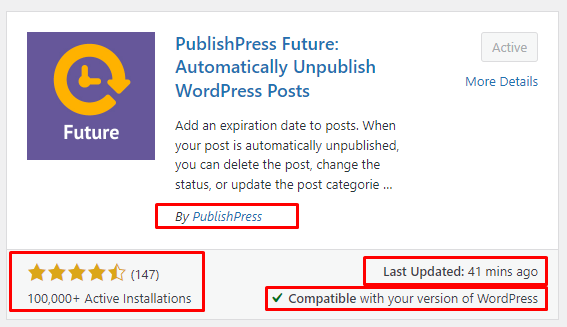
Signs of a good plugin:
- Known developer (ex: PublishPress)
- Large number of active installations
- 4+ stars
- Recently updated
- MUST: WordPress version compatiblity
Installing a new Plugin
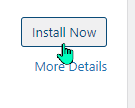
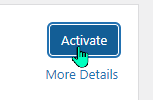
Once you have verified that the plugin is a good choice, click “Install Now” in the upper righthand corner.
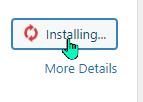
The plugin will download and install, then the next step is to click “Activate.”
Now, depending on the function of your plugin, you’re ready to rock some new website features.
Working with Plugins (Settings)
Depending on the function of your plugin, there are a couple of different places you may need to go to manage it.
Finding your plugin settings
Some plugins create their own entry in the WordPress dashboard sidebar. Examples of these:
- Tockify Calendar
- Give Donation Plugin

Some plugins add themselves to the general WordPress Settings menu in the dashboard sidebar. Examples of these:
- Notification Bar

Some plugins simply integrate themselves into WordPress and don’t have a separate settings menu. Examples of these:
- PublishPress Future
For more detailed information on how to adjust settings for plugins, see specific plugin instructions or send a help ticket to websitehelp@librarieswin.org.
Updating Plugins
Formerly plugins were one of the things that required regular updating and maintenance on library websites. Now we can enable auto-updating of plugins and themes which saves us a lot of work. Enabling automatic updates when a new patch is available mitigates the risk of a vulnerability going unpatched if you don’t get back to your website on a regular basis.
To see if you can enable auto-updating, review Auto-Updating Plugins and Themes.
However, some plugins don’t have this option, or you may log into your website before an automatic update is scheduled to run. If you see an indicator saying you have a plugin or theme needing to be updated, please take action immediately.
Deactivating/Removing a Plugin
If you are no longer using a plugin, it is a good idea to deactivate it, then completely remove it from your site. Each plugin adds a small risk of conflict and potential for site health issues, so deactivation/removal avoids that issue.
If you are not sure if a plugin is still functioning on your site, a good first step is to deactivate.
Deactivating a Plugin
Open the Installed Plugins menu
Select “Deactivate” under the plugin you don’t want to use anymore:
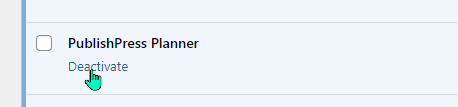
The plugin will now say “Activate | Delete” underneath the name.

Watch your website to see if you lose any functionality that could be related to the plugin.
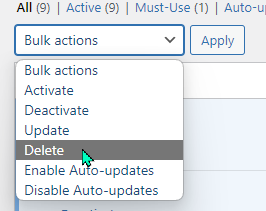
Removing a Plugin
If you have deactivated a plugin or know you are not going to use a plugin anymore, you can remove that plugin completely. Simply click “Delete” under the name of the deactivated plugin, and confirm.


If you want to remove multiple plugins at one time, this can be done through the “Bulk Actions” dropdown at the top of the plugins list.