Jump to Video
All pictures, documents uploaded to your website are stored in the WordPress Media Library.
A large number of media items, media items of excessively large size, or file types (videos, sound files, large images or PDFs, etc.) can negatively impact your website’s performance. This tutorial will help you understand how the Media Library is organized and how to manage items in it.
This tutorial will cover:
- Tour of the Media Library
- File types and basic/default organization
- Filtering media
- Searching for media
- Media meta data
- Alternative Media Library views
- Uploading media
- Editing media
- Removing media
- Advanced media management
Tour of the Media Library
The Media Library is part of the basic WordPress package – you don’t need the Divi theme to have the Media Library, and the Divi theme relies on the native WordPress library to manage media.
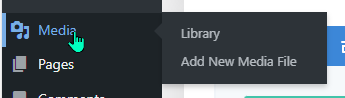
The Media Library is accessed from the lefthand menu – when you hover over “Media,” you are given the choice to go to the Library or directly Add New Media File.
Viewing Files in the Media Library
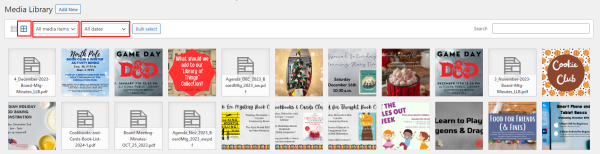
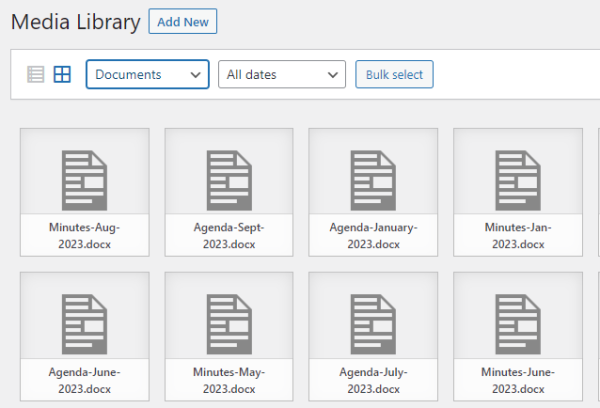
The default view for files in the media library is the “Grid” view. This shows blocks of media items with the newest items at the top left, and by default, “All media items” from “All dates” are visible.
Filtering Files in the Media Library
The two dropdowns (“All media items” and “All dates“) are your main filtering options for the Media Library.
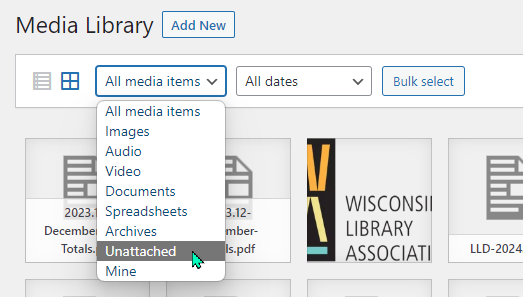
Filtering by media type
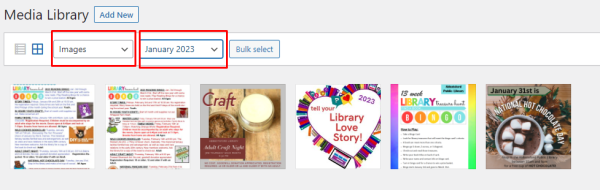
The dropdown under “All media items” allows you to select/view a single type of media in your website’s library:
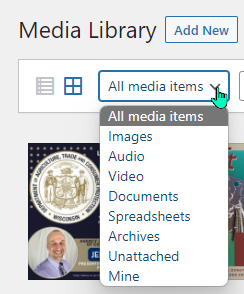
This filter shows all the media type options, even if you do not have any media of that type in the library.
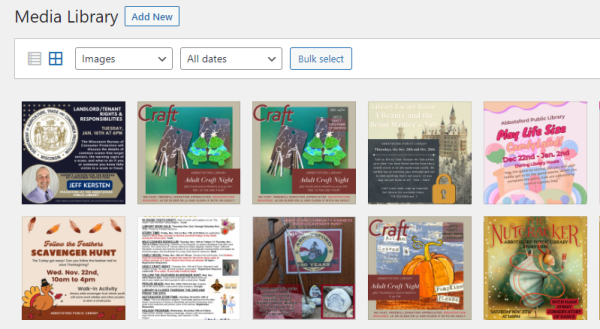
If you want to view only the items of a specific type, i.e., images, simply select the type and the filter will automatically be applied.
Advanced filtering options include “Unattached” and “Mine.” These will be covered in the “Advanced organization” section below.
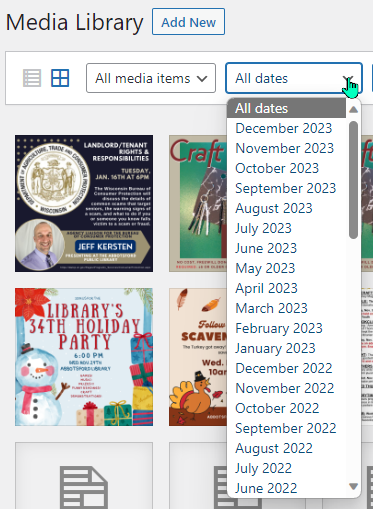
Filtering by media date
The next basic filtering option is by date. This is somewhat less useful, functionally, but is still an option.
Under the “All dates” dropdown, you can select media by month and year. This will show all items of the type selected in “All media items” dropdown for a specified Month/Year (which generally I have found to be too specific to be broadly useful).
Searching for items in the Media Library
The search function (on the right-hand size of the Media Library menu bar) is a fairly robust search function.
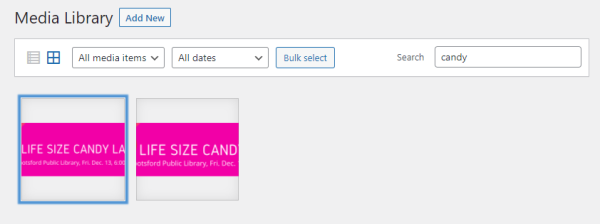
Search will find any terms in the media item meta data: alternative text, title, caption, description, or file name.
The more specific you are with any of these when adding items to the media library, the easier it will be to find later.
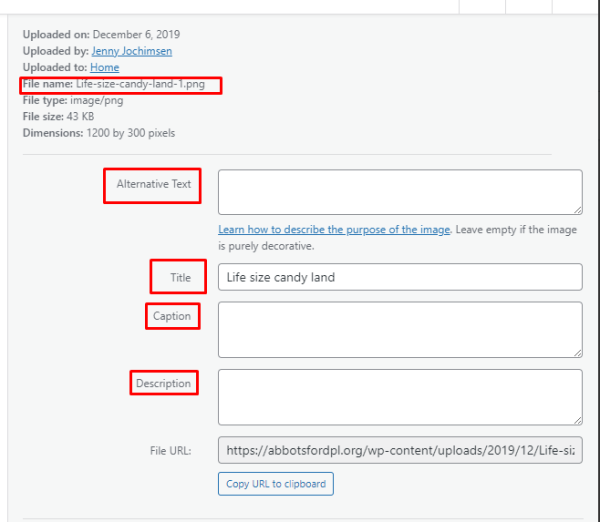
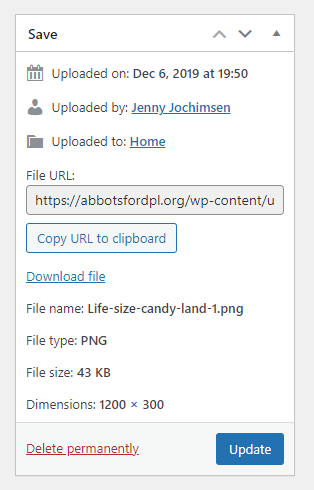
Media Meta Data
All media items have auto–generated meta data in addition to the user-supplied information (alternative text, title, caption, description, and file name – see above). This includes:
- Date uploaded
- User who uploaded the item
- Location item was uploaded to
- File type
- File size
- Image dimensions (images, video only)
- Length (audio/video only)
- Bitrate (audio/video only)
Alternative media library view
“Grid” is the default media library view.
“List” is an alternative view – select this view by clicking the bullet list icon next to the squares icon on the upper left hand side of the Media Library menu bar.
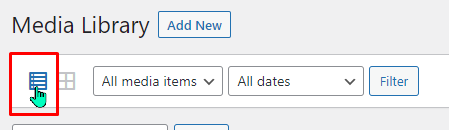
Now, instead of a grid of icons, you will see a list of media items with some meta data visible in columns.
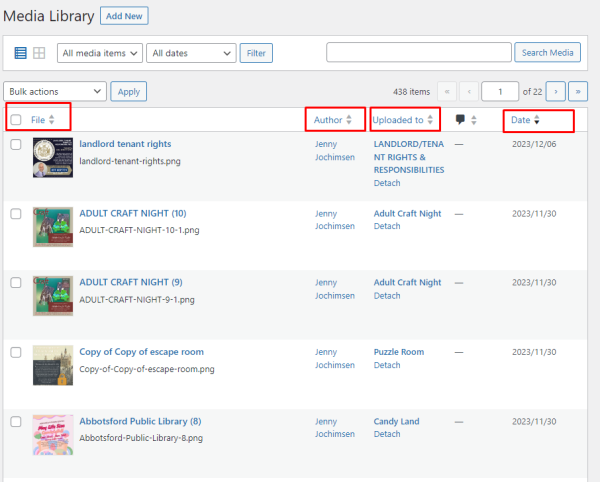
The same filtering and search options are available as with the grid view. An added feature to this view is the ability to sort media files by the columns – file name, author, upload location, message/note, or date.
In this example, media are sorted by date added, with most recent first. By clicking on the column, the sort would reverse and the oldest would appear first.

Uploading Files to the Media Library
The first step in adding an image, document, or other media to a webpage is to upload it to the Media Library.
You can do this within the Media Library itself or from the post or page you are editing.
Adding Files to the Media Library
Begin by saving your file with a descriptive title, such as, “01-2024 Library Board Agenda,” or “2024 Summer Reading Artwork.”
Open the Media Gallery and select “Add New Media File.”

or
![]()
Select the file from your computer and click “open,” and “upload.”
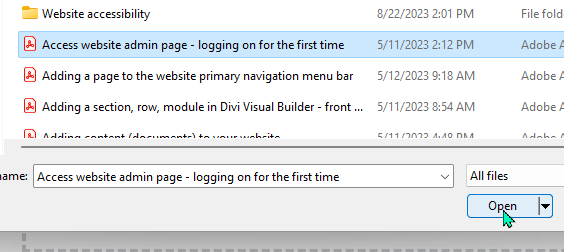
Note: images will appear in the library with a preview of the image. All PDF items will appear as a grey document icon – only the title will provide a description.

Image file in media library
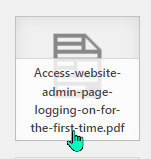
Document file in media library
You can edit the title of file in the Media Gallery, but it will not change the file name.
The next step is to inset the item into a post or page on your website. See Creating a new blog post for my website for more details.
Editing Media Metadata
Metadata is information about the media file held in the media library. This includes information that cannot be changed, and information a website manager can edit.
Types of metadata
Metadata that cannot be changed:
- Date uploaded
- User who uploaded the item
- Location item was uploaded to
- File type
- File size
- Image dimensions (images, video only)
- Length (audio/video only)
- Bitrate (audio/video only)
Metadata that can be managed by the website manager:
- File name (added before a file is uploaded)
- Alternative text
- Title
- Caption
- Description
Alternative text is a textual substitute for non-text content in web pages (Source: https://webaim.org/techniques/alttext/).
Alternative text serves several functions:
- Screen readers announce alternative text in place of images, helping users with visual or certain cognitive disabilities perceive the content and function of the images.
- If an image fails to load or the user has blocked images, the browser will present the alternative text visually in place of the image.
- Search engines use alternative text and factor it into their assessment of the page purpose and content.
Title is auto-generated from the file name but can be changed after the file is uploaded.
Caption appears with the media item wherever it is posted on your website. It does not replace the Alt Text, but screen readers could read it.
Description does not appear on the item but gives more context and would assist in making your media item more searchable in the media library.
Removing Media from the Media Library
A large number or a large number of large media files can impact your website’s public performance – mostly if those files are on a single webpage on your website.
But a large number of media files can also slow down back-end functions such as backups and server retrieval.
Keeping your library cleared of old content is good insurance towards improved performance.
Note: deleting a post or page does NOT automatically remove the Featured Image or other media items on it from the Media Library. You must delete them separately directly from the Media Library.
Deleting individual media files
Deleting individual files is straightforward.
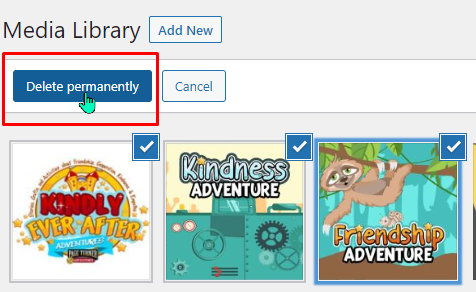
When you select an item, “Delete permanently” appears at the bottom right corner of the “Attachment details.”
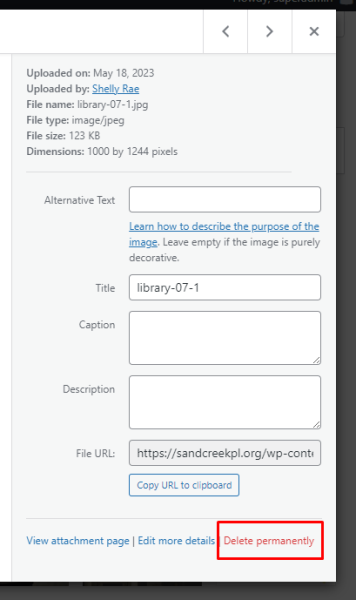
Note: this does not send the item to a trash/recycle bin – once deleted, the media item is permanently deleted.
Bulk delete media files
Another option in the Media Library bar is “Bulk select.”
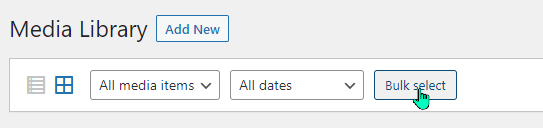
Bulk select allows you to select multiple items in your Media Library and perform a single action on all of those items. In this case, you can select multiple items and the option to “Delete permanently” appears in the menu bar.
Note: this does not send the item to a trash/recycle bin – once deleted, these media items are permanently deleted.
Using the “search” and media item type/date filtering options in combination with bulk select can make the Media Library cleanup more efficient.
Advanced media management - introduction
One of the trickiest – and yet, most handy – things to know about media items on your website is if they are still being used (linked) on your website. There isn’t currently a reliable to test or metadata to show exactly where a media item might appear on a webpage.
Without knowing this, you run the risk of accidentally deleting media items only to discover broken links or missing images later.
The following are tips and tools to help find and organize media items on websites with a large number media files, especially those that might need to be updated/replaced later.
"Unattached" items in media library
When you create a post or a page on your website and add media, that media will be marked as “uploaded to” that post or page in the metadata.
The Media Library now offers “unattached” as a filtering option on the dropdown filter:
However, if you edit an existing page and change the media (add documents to a library board meeting page or change the image on your Summer Reading page, for example), those items will not show as “uploaded to” those pages. They will appear as “unattached.”
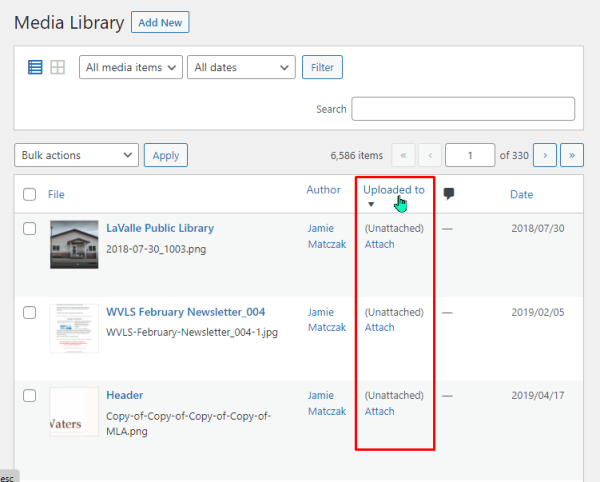
When using the “List” alternative view you have an additional metadata view of where a media item is uploaded to (“attached”). The list view allows you to sort items WordPress identifies as “Unattached” on your website.
Selecting the “List” view
Select this view by clicking the bullet list icon next to the squares icon on the upper left hand side of the Media Library menu bar.
Now, instead of a grid of icons, you will see a list of media items with some meta data visible in columns.
Sorting to view “Unattached” items
Click twice on the “Uploaded to” column and the Media Library items will sort themselves to show (Unattached) items. The hyperlink “Attach” underneath allows you to assign that item to a page or post, or you can determine if the item is ready for deletion.
Note: remember when an item is deleted, it is permanently deleted – there is no way to recover it from a recycle bin or trash.
"Real Media Library" plugin
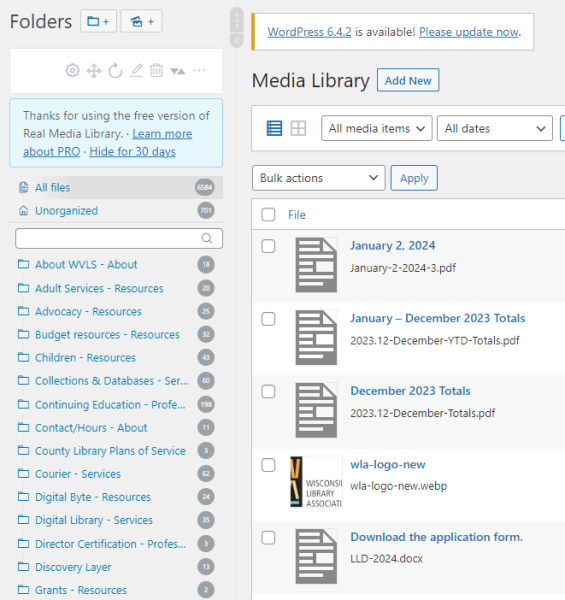
If your website has a LARGE number of media items that need organizing, there is the option of installing the Real Media Library plugin.
For instructions on installing plugins visit https://training.librarieswin.org/website-101/plugins/ or send a helpdesk ticket to ask the plugin be added.
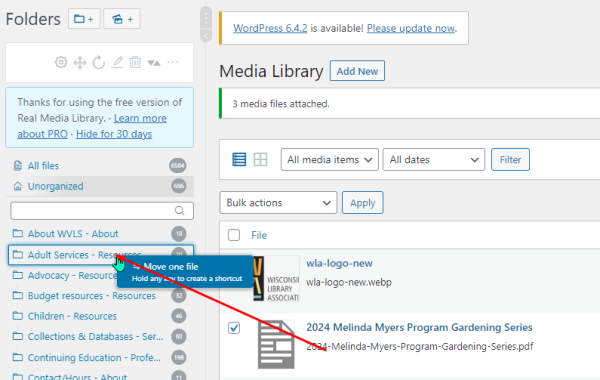
The Real Media Library plugin allows you to create folders for organizing media files. This is a separate organization from the native Media Library filtering and search.
Note: there is a paid version of the Real Media Library, but the free version is fully function for basic organization.
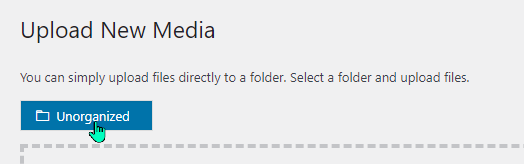
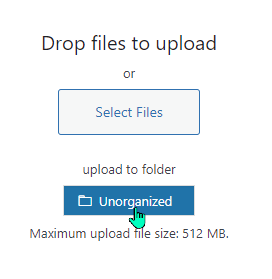
Organizing media files when the file is uploaded:
or
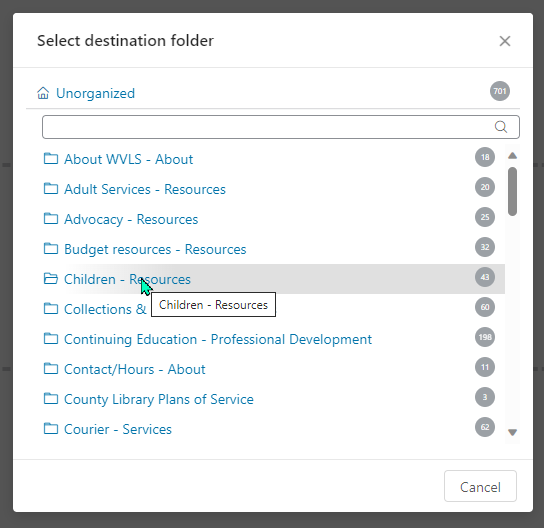
Organizing by moving media items to folders after they have been uploaded:
Drag and drop:
Or when editing details of individual media items:
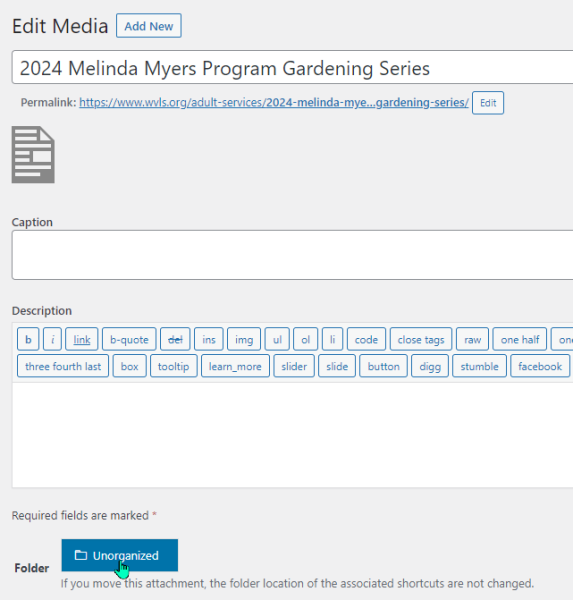
Viewing unorganized files:
To keep track of which files need to be added to a Real Media Library folder, select the “Unorganized” folder – this filters the items that are not yet in a custom folder:
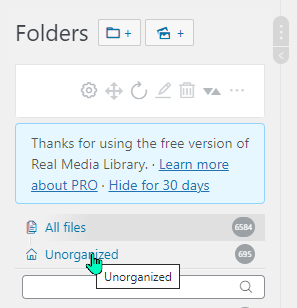
If used in combination with the “lsit” view to identify which page a file is attached to, it can make sorting easier.