Jump to Video
Menus are the key elements that allow a user to navigate your website. WordPress/Divi offer three menu options, but we generally only use two of them. These can be edited through both WordPress OR the Divi theme. More than likely your menus will be managed through the WordPress editor.
Your website design may vary – yours may use some alternative designs for menus or some global options. Send a ticket for assistance in reviewing the design of your specific website.
This article covers:
- Understanding and identifying menus on your website (listed from top down on a webpage).
- Understanding what edits and adjustments can be made to your menu using the WordPress vs. the Divi theme editor.
Table of contents
![]()

![]()

Header Elements (Header & Navigation - Divi)
The top of your webpage has two spaces for header information which includes the header elements area, and the Primary (dropdown) menu area. While technically the header elements aren’t a “menu” they do occasionally need to be updated and can be tricky to get at.
While technically not a “menu,” the header elements that appear at the top of many library websites do occasionally need to be changed.

This area is part of the Divi Theme, so needs to be accessed through the Divi Theme Customizer, accessed in the lefthand menu on the dashboard.
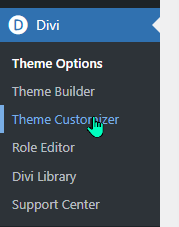
This customizer. Next click on “Header & Navigation.”
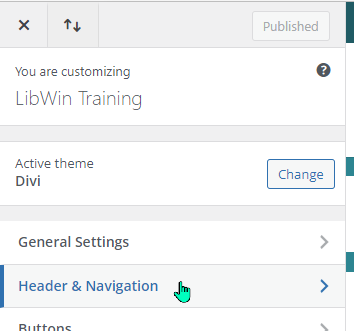
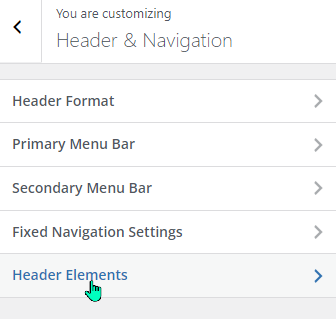
Next select Header Elements
Now you can update the information on the top header bar of your website:
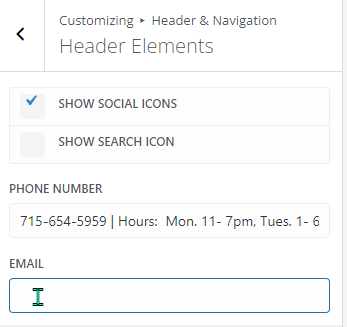
Note: this screen does show a live preview of the changes you are making on your websie.
Adding Items to the Primary (dropdown) Menu
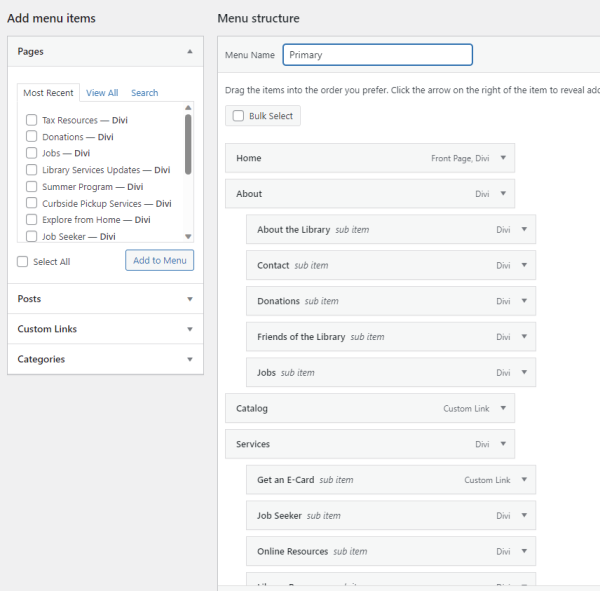
The Primary (header/dropdown) menu is not limited to linking just to other pages on your website. On the right side of the “Edit Menus” screen, under “Add menu items” there is a toggle with the different items that can be linked: Pages, Posts, Custom Links, Categories.
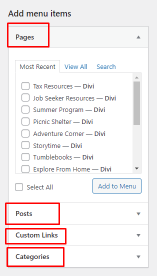
95+% of the time we will be linking to other internal website pages. However, you can create a link to an outside website by filling in that website under “Custom Links” (example, linking to the discovery catalog):

Or even create a link to all posts in a category:

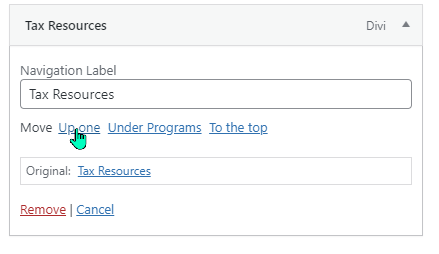
When you add an item from the list on the lefthand side, it will automatically be added to the bottom of the primary menu list. From there you can drag and drop it – or follow the click the down arrow carrot on the right side of the bar and select the links to move the widget box.
Removing Items from the Primary (dropdown) Menu
Huzzah, you have survived summer reading!
Many websites have a webpage dedicated to their summer reading program. At the end of the summer, you likely will want to remove this page and store it away until you start updating it next spring. Good news is you don’t need to delete this page – you can simply remove it from the dropdown menu.
Open the Primary Menu editor, staring in the dashboard:

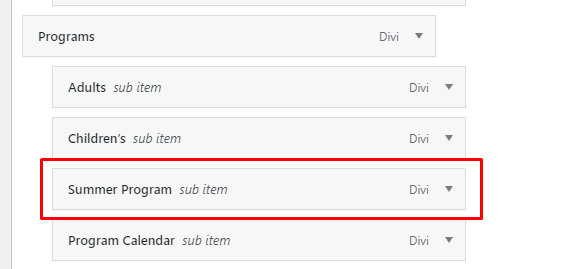
Now find your Summer Reading page widget box.
And click the down arrow on the righthand side and click “Remove.”
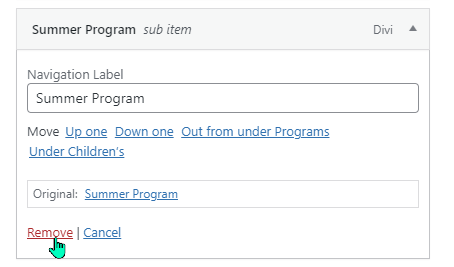
Make sure to save your menu changes, and Summer Reading is gone from your website.

Remember, the page is not gone – and it can easily be added back to your menu simply by selecting it from the list on the lefthand side again and moving it to the place you want it.
Changing the Logo in the Primary Menu
Your library has a new logo – congrats! Now you need to update that logo on your primary menu.
Follow this link for instructions on how to change the logo in your primary menu.


