Jump to Video
Want to practice building with the Divi Builder?
Want to create your own page on your website?
Building a page from scratch is intimidating, messy, time consuming, and generally unnecessary. And if you’re new to the Divi Builder and just need somewhere to play, cloning a private page is the way to go!
Don't want to build your own? Like something from another website?
Note #1: you do not have to build your own page – submit a request to the Helpdesk and LEANWI Website staff will build a page for you as needed. However, if you’re interested in DYI, please read on!) Copying or cloning a page is the best way to start from a template and modify or practice as needed.
Note #2: if you see a page from another library’s website (example, Library Board/Library Policies, Foundation information page, a fun program page, a local history page, etc.) that doesn’t currently exist on your website, there IS a way to copy a page from one Divi website to another. Send a ticket to the helpdesk and we can assist you.
Step 1: Clone an existing page Using Divi
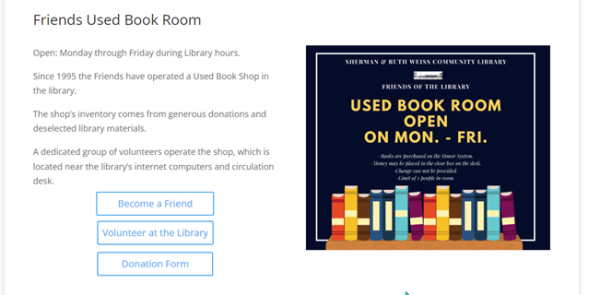
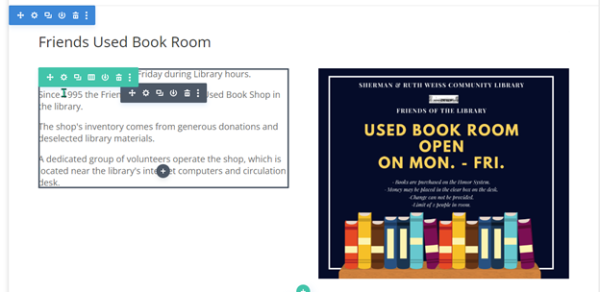
In this example, Sherman and Ruth Weiss Community Library (Hayward, WI), wants to add a YouTube video tour of their library to their website. There doesn’t need to be a lot of content on the page, so we will copy the “Friends Used Book Room” page which has an image and some text and buttons in addition to the standard header/footer information.
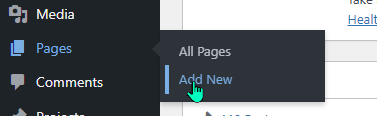
To copy a page we like, make note of it, and log in to your site’s dashboard. On the lefthand side menu, hover over “Pages” and click “Add New.”
This will open the Add New Page Editor.
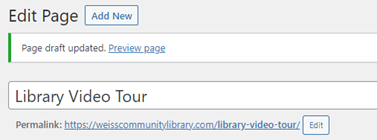
Create a title for your page and hit enter. This will create your page link with the new “slug” at the end. You can edit this link to customize the slug to your liking.
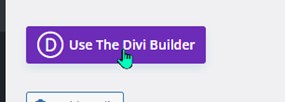
Next click on “Use the Divi Builder.”
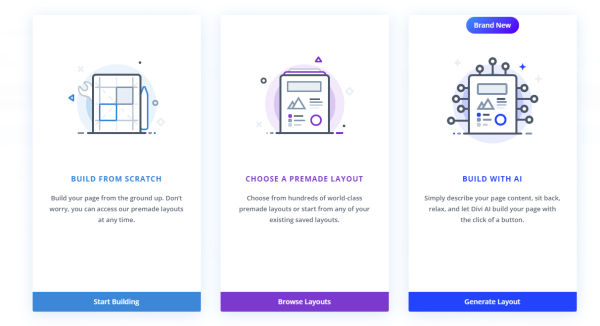
You will see three choices: Build From Scratch, Choose a Premade Layout, or Build with AI (as of the most recent Divi update).
Select “Choose a Premade Layout”
Now you’ll see a Load from Library menu. The list of your website’s current pages in the last tab: Your Existing Pages.
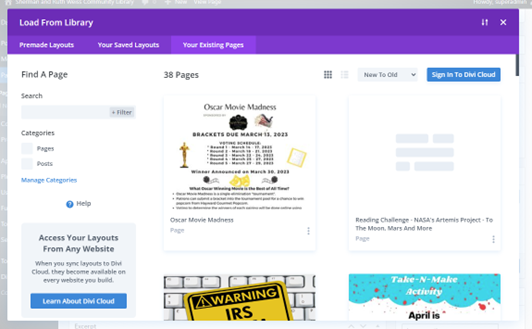
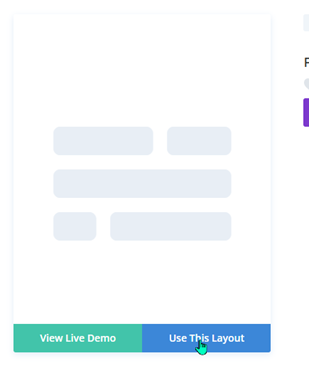
Scroll down until you see the page you wanted to clone (“Friends Used Book Room”) and select it, then click on “Use this Layout.”
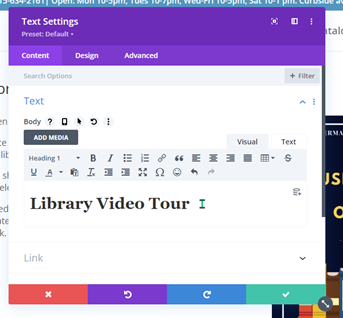
Now our “Library Video Tour” is pre-populated with the information from the Friends Used Book Room.

Step 2: Removing content
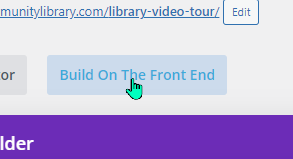
At this point I am going to switch to “Build on the Front End” so I can see what I’m working with.
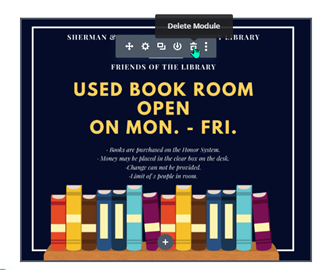
I’m going to start with deleting the content I know I don’t need (extra image modules, buttons, etc.)
Now I’m left with a blue section container with two row containers – the first one has the “Friends Used Book Room” title module in it. The second has two side-by-side modules, one with text and one with an image.
Next step is to change the header title by hovering over until the black box appears and clicking on the gear icon. The editor opens up and I can change the page title.

Now we’re going to delete the image module by clicking on the black trash can and change it to a video link.
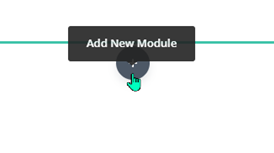
We’re left with a big empty hole with a black + circle.
Now it’s time to add new content!
Step 3: Adding new content
Click here to learn more
——–
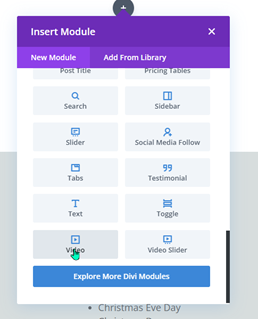
Click on the circle to open the module menu:
And for this one, we’re going to scroll all the way to the bottom to find the “Video” module and select it.
Divi loves throwing its advertising around, but if you can see on the right side in the mess, there is a gear icon and a trash icon. Click on the gear.

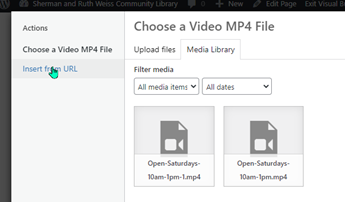
This will ask you to choose a Video MP4 File, but there is the option to “Insert from URL” on the far left side.
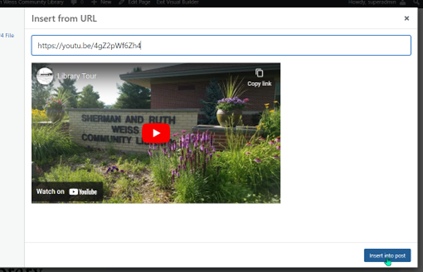
Now we go to YouTube and copy the video link.

Paste the link on your Divi page, and you’ll see a preview picture from the video. Click “Insert into Post.”
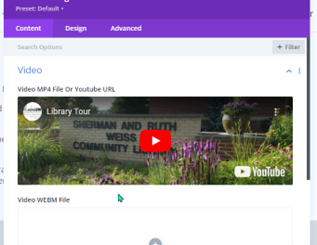
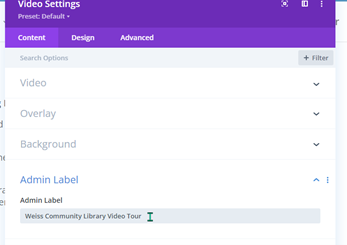
Now you’ll see your still preview in the Video Settings menu:
Step 4: Finishing up
Be sure to set the Admin Label at the bottom of this menu:
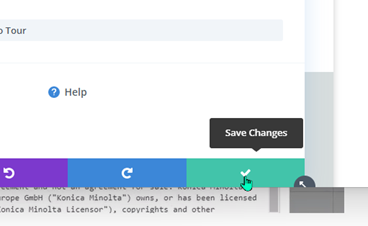
And click “Save Changes”
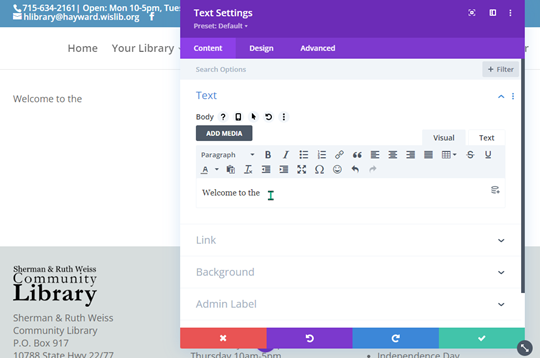
Now to update the text on the left side module.
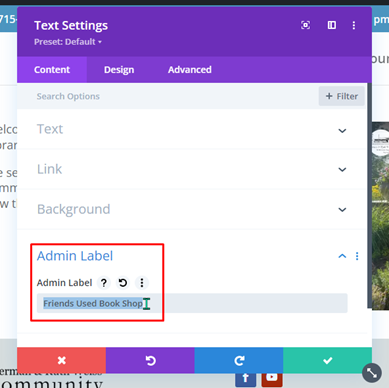
Be sure to update the “Admin Label” so it doesn’t have the info from your cloned page.
Hit save, exit visual builder,
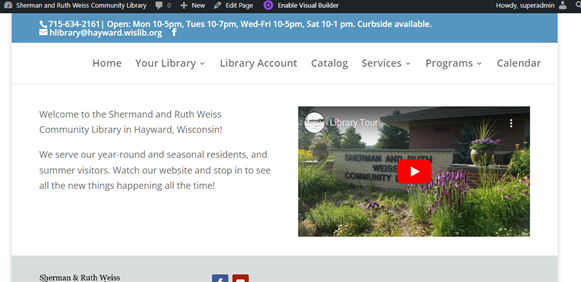
and sit back and admire your work!
If you like what you’ve got, hit that purple button at the bottom of the page and hit “Publish” on the far righthand side – and your page will be live for the public to view.