
This document is intended to give step by step instructions on how to remediate a number of common accessibility issues. A level of competency required will be given for each task so you can decide for yourself whether this task is worth trying to undertake currently, delayed for another time, or perhaps it is better passed over to LEANWI staff through our email ticketing system (websitehelp@librarieswin.org).
There are numerous websites to help you to evaluate a web page’s accessibility typically giving your overall page a score and displaying errors. While not a perfect measure of your page’s true accessibility they are the most convenient tool we have at the moment. Some of these are:
https://accessibe.com/accessscan
PageSpeed Insights (web.dev)
Accessibility IMpact (AIM) (webaim.org)
Site Improve Accessibility Checker extension for chrome and edge
For our purposes we are going to begin fixing our accessibility issues using the https://accessibe.com/accessscan website and entering the page of our URL…
Topics in this tutorial:
- Before we start: prerequisites
- Divi Supreme Pro Plugin
- What if it asks for a license?
- Getting started: website scan
- First scan
- Interpreting results
- Resolving accessibility issues
- Finishing: rescanning for errors
- Final check: WAVE from WebAIM
Setup: Website Accessibility Remediation Prerequisites
To make some of the changes in the Divi Modules that we need to make we need to have the Divi Supreme Pro plugin installed on your website. You should see the plugin in your left sidebar of your WordPress dashboard.
- Do I have Divi Supreme Pro on my library website?
The Divi Supreme Pro plugin has been installed on all IFLS, NWLS, and WVLS Divi websites and is being rolled out across WRLS as updates/rebuilds are happening. If the plugin is installed, you will see a “Divi Supreme Po” link in the black menu bar on the left side of the WordPress dashboard: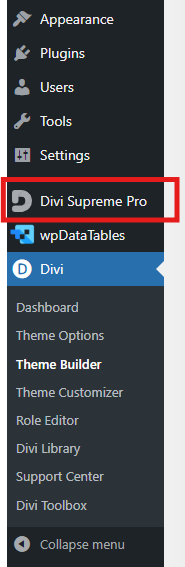
If you do not you will need to send a ticket to websitehelp@librarieswin.org and ask us to install the plugin. We need to install it as we have the licenses that are required. - What if it tells me I need to enter a license key? In some cases, it seems the license key has not been “sticking” on some websites. If you see this, please send a ticket to websitehelp@librarieswin.org so we can re-enter the license key.


- Divi Supreme Pro dashboard menu
Then from your Divi Supreme Pro menu you should see that the Divi Custom Attributes are enabled:
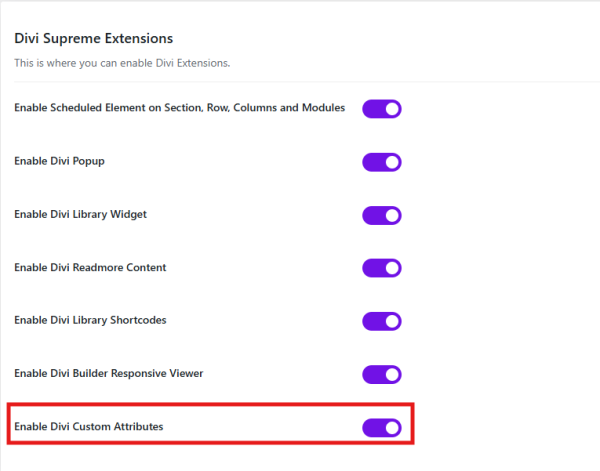
Once enabled you are ready to get started!
Getting Started: First Website Scan
Accessibility scan of our website to determine issues
Go to https://accessibe.com/accessscan
Enter your website URL where it says “yoursite.com”
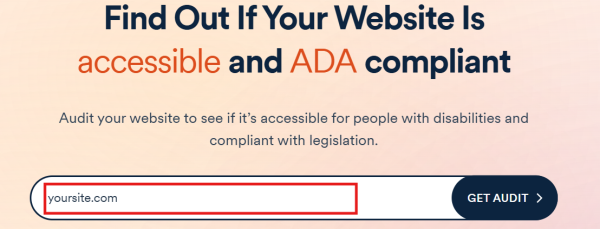
I typically like to start fixing a website starting from the home page so entering the base library URL would be a legitimate entry here for example ‘bluelakelibrary.org’. If you wish to update another page of your website you would enter the URL to the page on your website for example ‘bluelakelibrary.org/contact-us/’ for the contact page of your website.
Note: The actual URL of the page you are wanting to scan can be found in the address bar of your browser when that page is open.
Once the correct URL is entered click the “GET AUDIT” button on the screen.

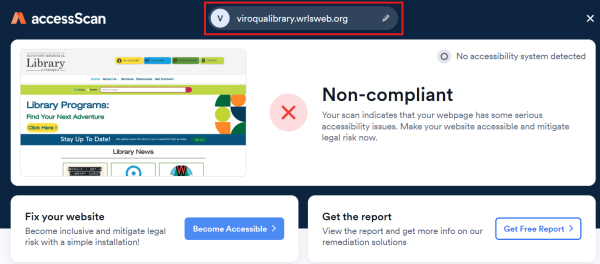
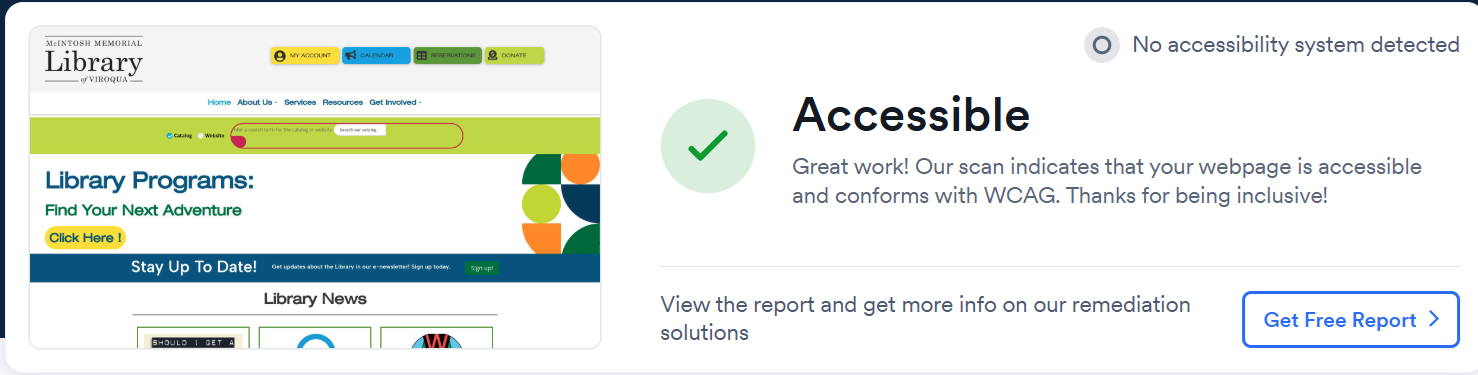
If you see a screen that looks something like the following then we are on our way.
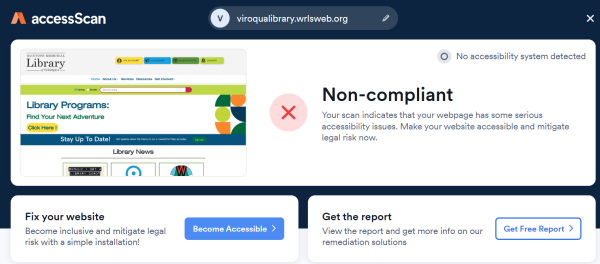
Make a quick check here that the URL that the checks were performed on is the intended site and/or page.
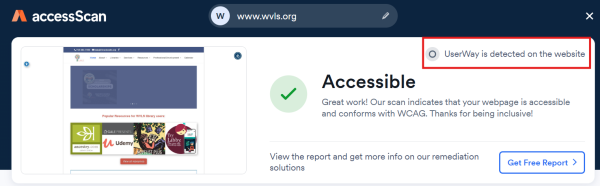
Note: If there is an accessibility system installed on your website this page may look more like the following with the accessibility system detected and likely a decent accessibility score to begin with.
For the purposes of this document, I am going to assume that an accessibility system is not installed on your website allowing us to try and deal with accessibility issues at the design stage of our website rather than when the website is being presented. It may be good to note however that products do exist that can fix particular accessibility issues that are presently difficult for us to fix in a WordPress CMS /Divi theme environment.
Resolving Issues
The sections below break down specific errors that can be address with Divi/WordPress. We’ll start from the top of the accessScan page and work our way down. I will skip issues that are either not likely to be encountered or are obvious in their nature (i.e. Buttons cannot be empty).
Clickables
Error: Elements with button functionality should be tagged for assistive technology
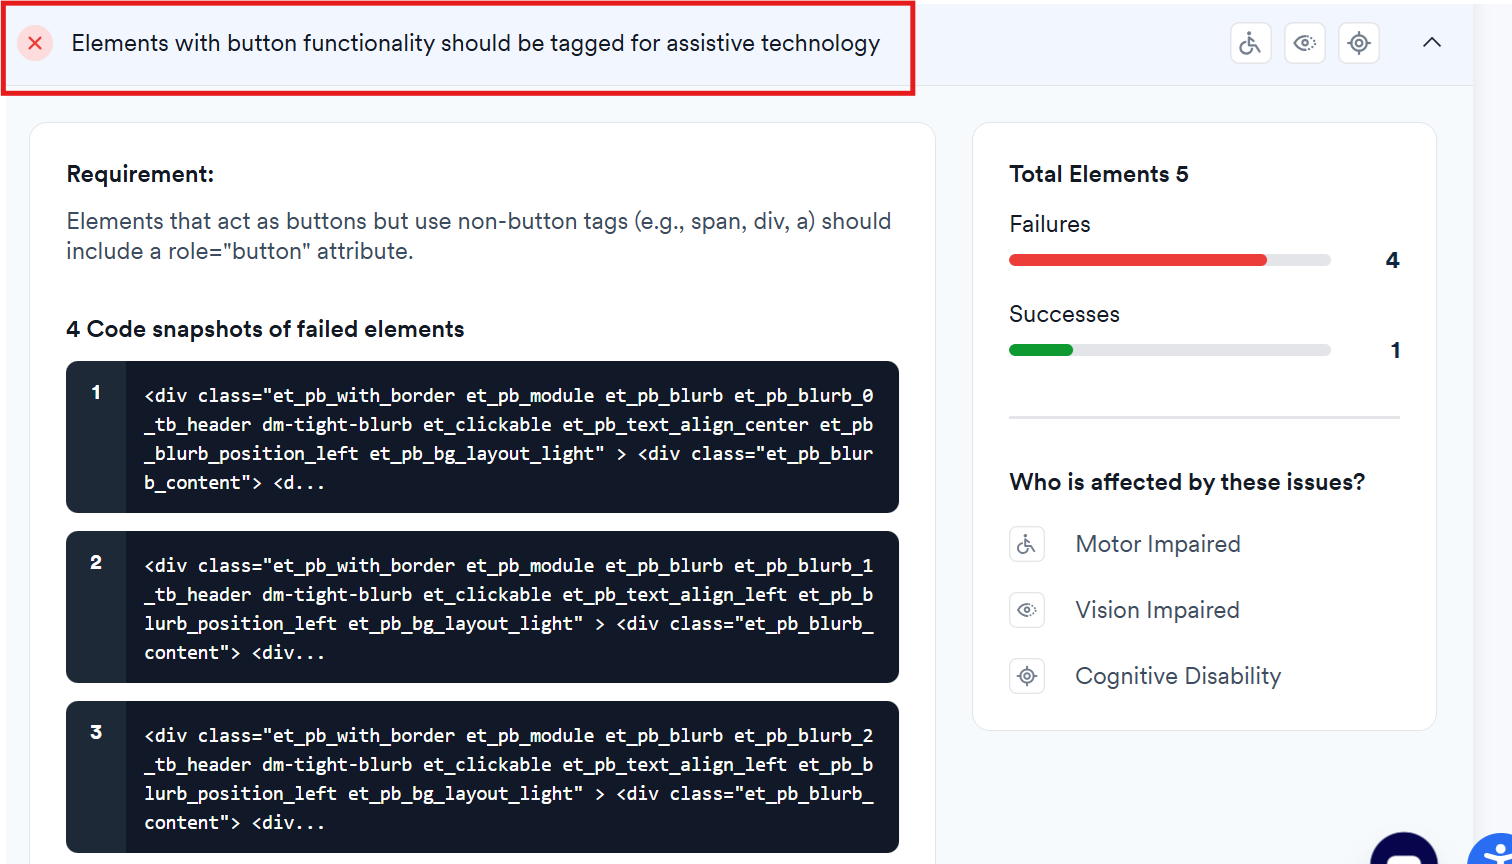
After clicking on the summary of the issue you may see something like this:
Step 1: how do we find out which elements are causing the issue?
Jump to video – Using Divi Supreme Pro to add Custom Attributes
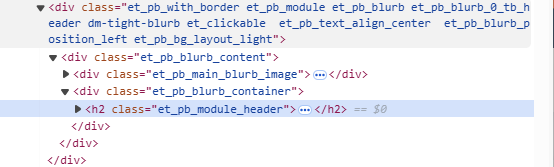
We often need to get clues from the code snapshots. Here we can see that the module that is causing the problems is a blurb module:

This may be enough information for us to guess which elements might need fixing on the page – any blurb modules on the page or we may have to investigate more which modules might be affected understanding that the module may be in the page or the header or footer. To find these modules you can either look within your divi pages for blurb modules or right click on the different elements in your browser to inspect each element:
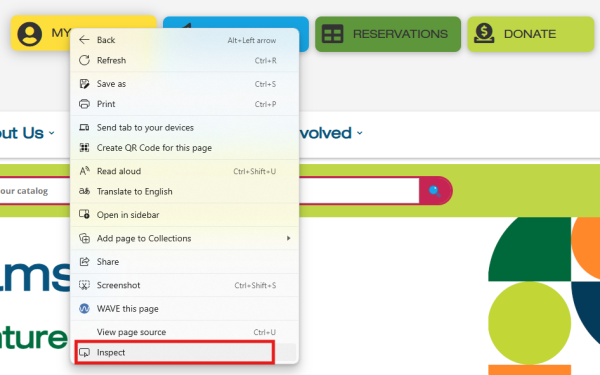
Once “Inspect” is clicked you may see something like this come up on the right of your screen:
From reading this we are able to tell that this element is indeed one of the elements that is causing this issue.
In my case these blurb modules exist in the header. Now that we have found the elements let’s try and fix the issue.
Step 2: how do we fix the issue?
Under the issue we are given what the requirement is:

Because these blurbs are acting like buttons it wants us to tell the screen readers that this is a button.
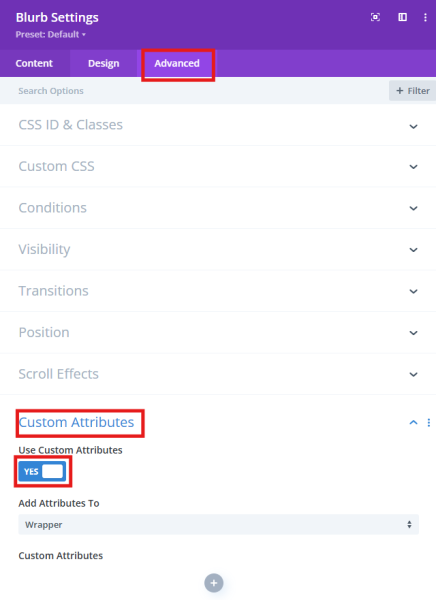
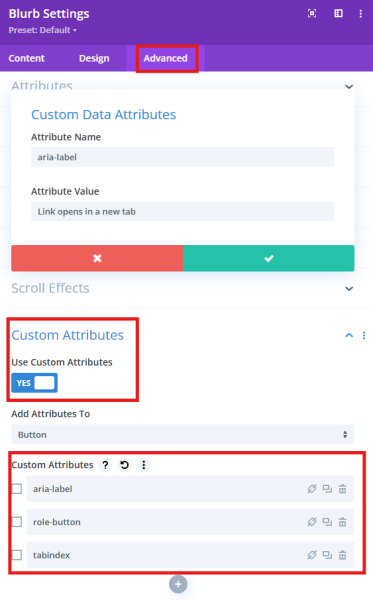
Go into the Divi Page, Header or Footer where this element exists and open the settings for the element and go into the Advanced tab where at the bottom you will see Custom Attributes. Click under the Custom Attributes to toggle this setting to ‘Yes’:
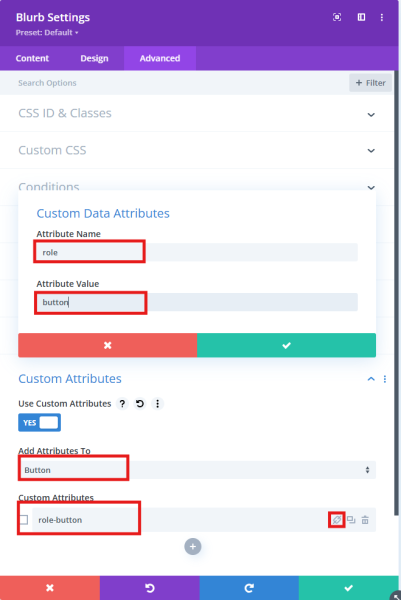
To add the role=button attribute to the correct attribute we need to select Button from the drop-down list, we add a label of role-button to the Custom Attributes. We then click on the link icon and add an attribute name of role and an attribute value of button and save by clicking the green tick.
Click the green tick for the module, and make the same change to any other blurb modules you think will need it, then save the page.
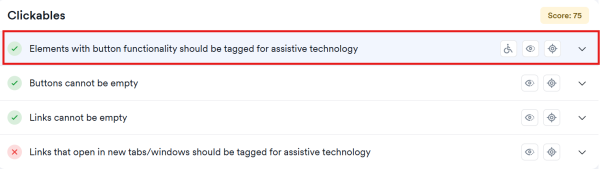
Hopeful if you now refresh the AccessScan page this issue will now be fixed:
Error: Links that open in new tabs/windows should be tagged for assistive technology
After clicking on the summary of the issue you may see something like this:
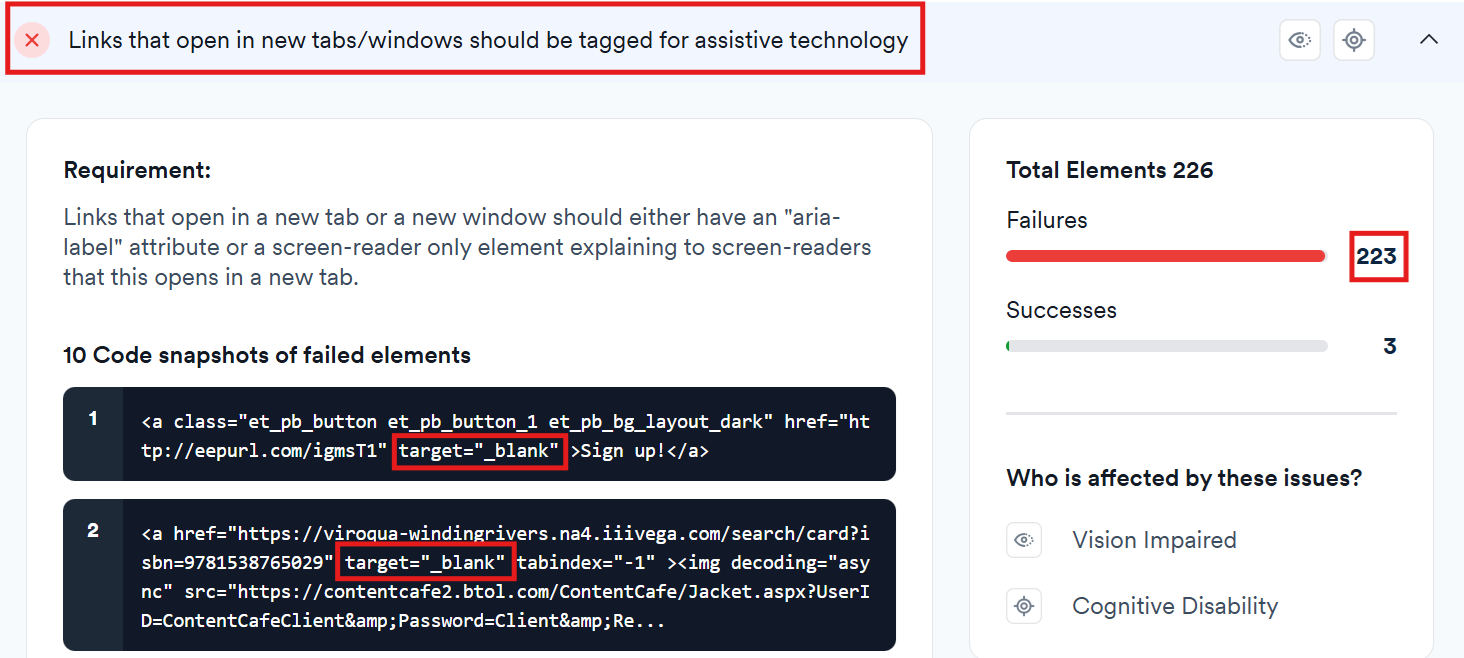
The requirement for compliance is that where we have a link opening in a new tab (indicated by target=”_blank” in the link attributes) we need to tell the screen reader that clicking on this link takes the user to a new window by adding aria-label=”This link opens in a new tab” to the link’s attributes also.
Note the alarming number of failures – 223! On further investigation it appears a book carousel plugin we are using is the issue here and the plugin does not allow us to make any necessary changes. The only option in this instance would be to come up with a different solution than the existing plugin.
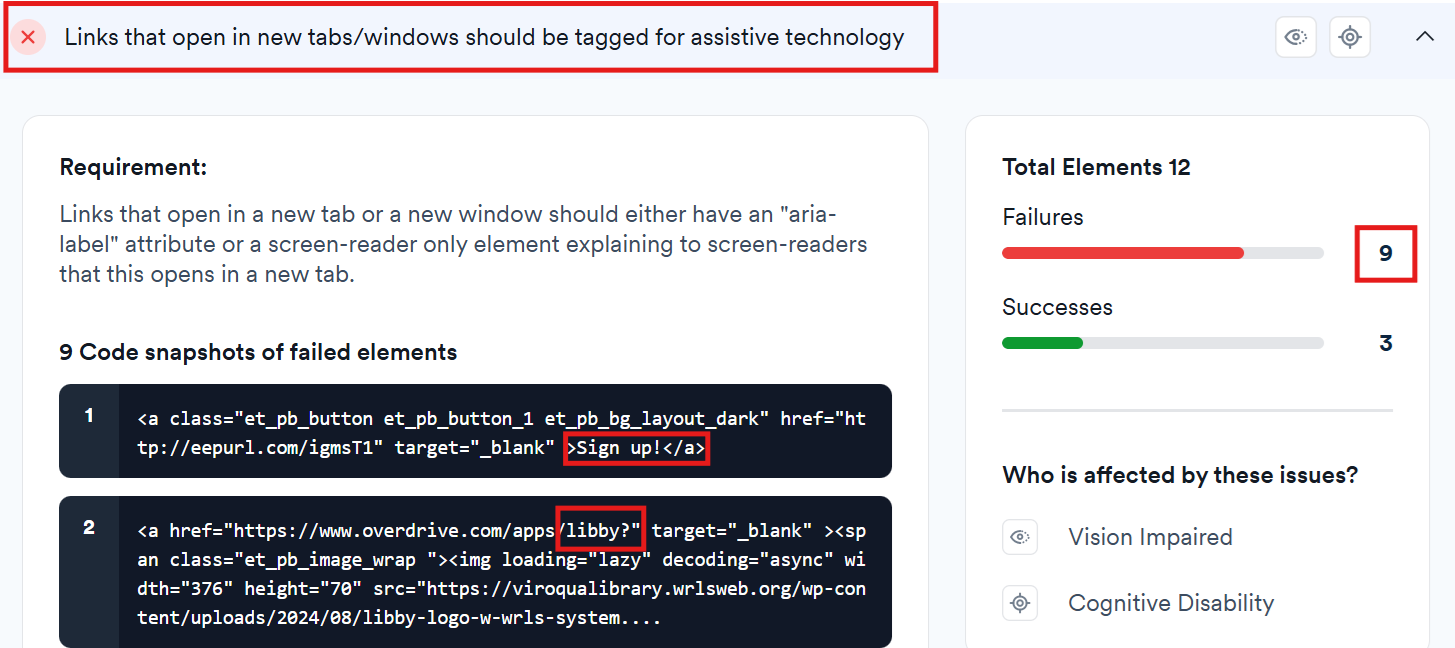
For now I am going to disable the plugin so I can see if other elements are also causing this error.
After rescanning the page without the offending module we get a more manageable number of errors:
Jump to video – Using Divi Supreme Pro to add Custom Attributes
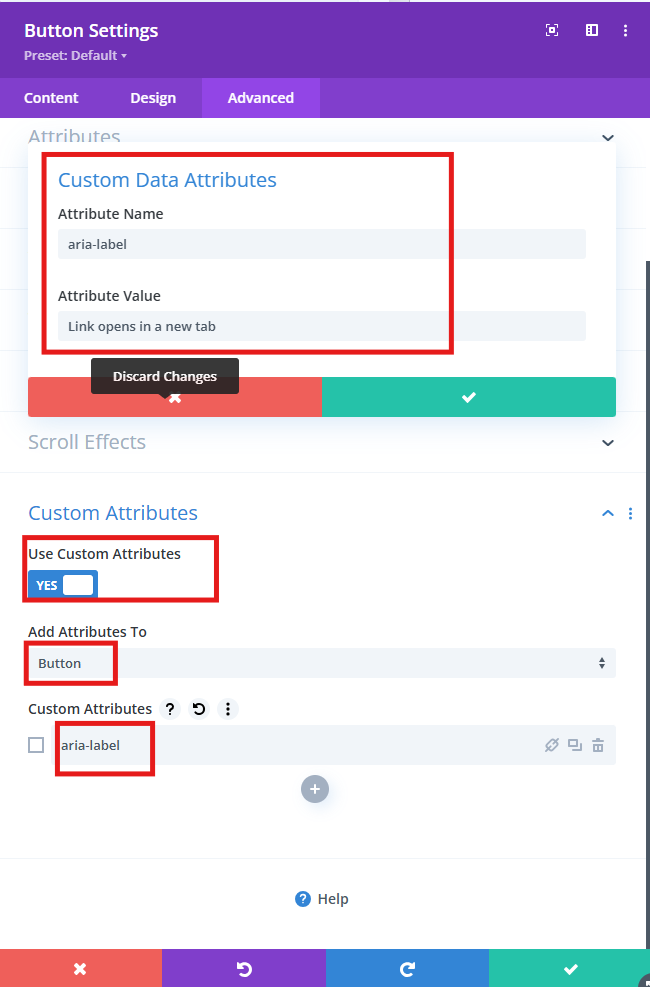
Now we can understand that we need to go through elements where the link opens up in a new tab and add aria-label=”Link opens in a new tab” by adding this to the custom attributes of the module:
Special fix for if we see a menu item as an error
This is quite common and a change likely needed to your website. This is a change best performed by a member of the LEANWI staff as it requires a child theme to be created and code placed in your new functions.php file to fix menu errors. The error may look like this for example: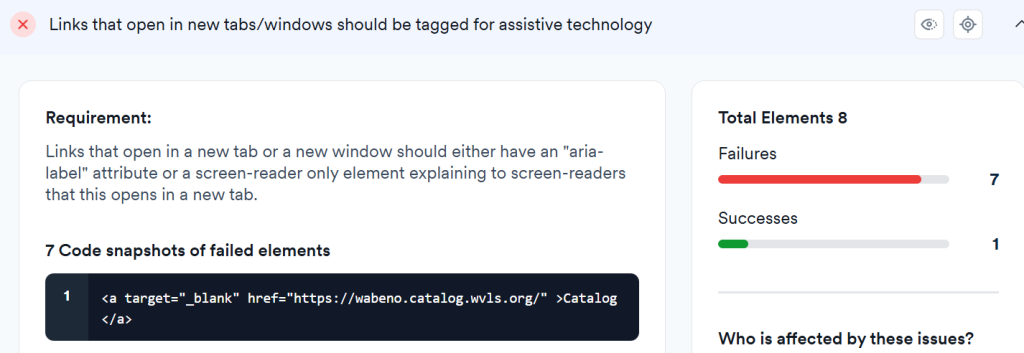
In short, the following code needs to be added to the functions.php file of your child theme:
function tg_atts( $atts, $item, $args ){
// inspect $item, then …
$atts[‘role’] = ‘button’;
$atts[‘aria-haspopup’] = ‘true’;
return $atts;
}
Special fix for Divi Image Module Images
The above fix does not currently work for Images created using the Divi Image Module. If you want to use an image as a link that opens in another tab currently it is required that you turn the link into a Blurb module. Here is how:
Create a blurb module under your image with blank title and body contents:
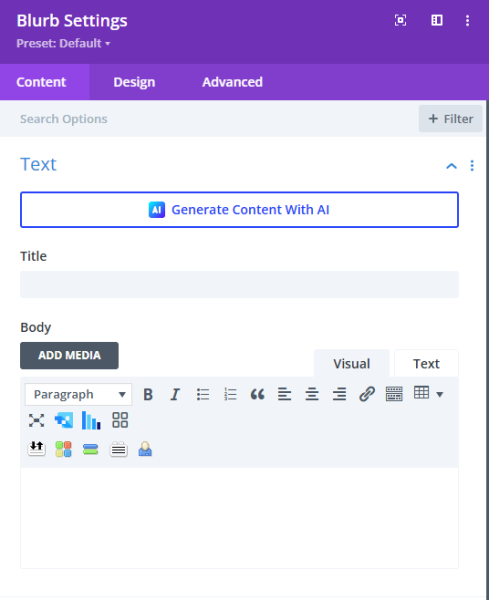
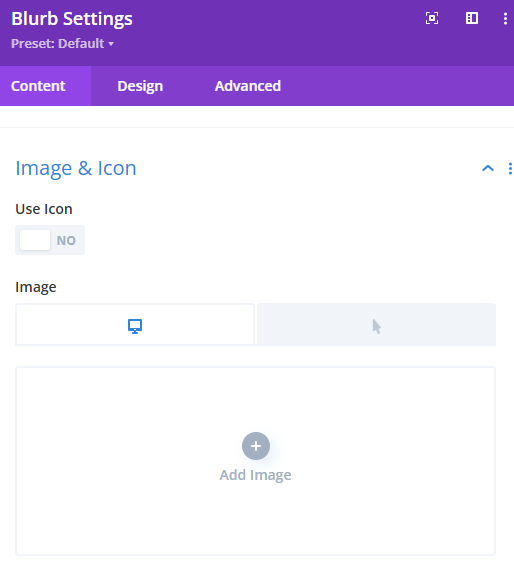
The Image & Icon section will also be empty:
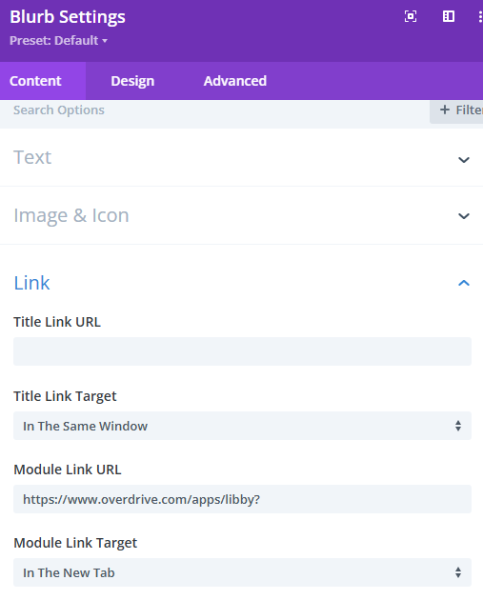
Add the link as it appears in the Image module:
In the background section add the image from your Media Library in the background image section:
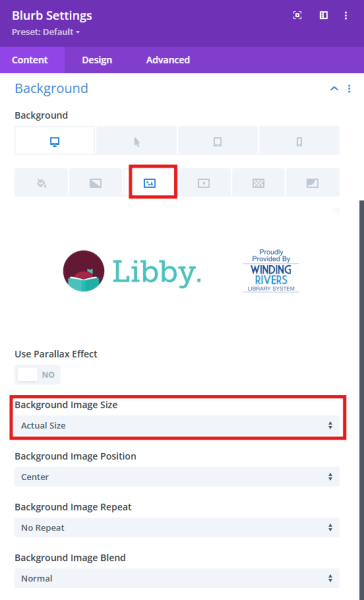
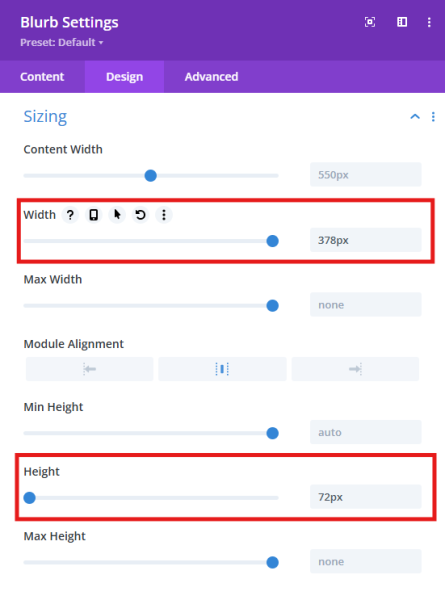
As there is no actual image to base the sizing of the blurb from we need to specify the size of the blurb:
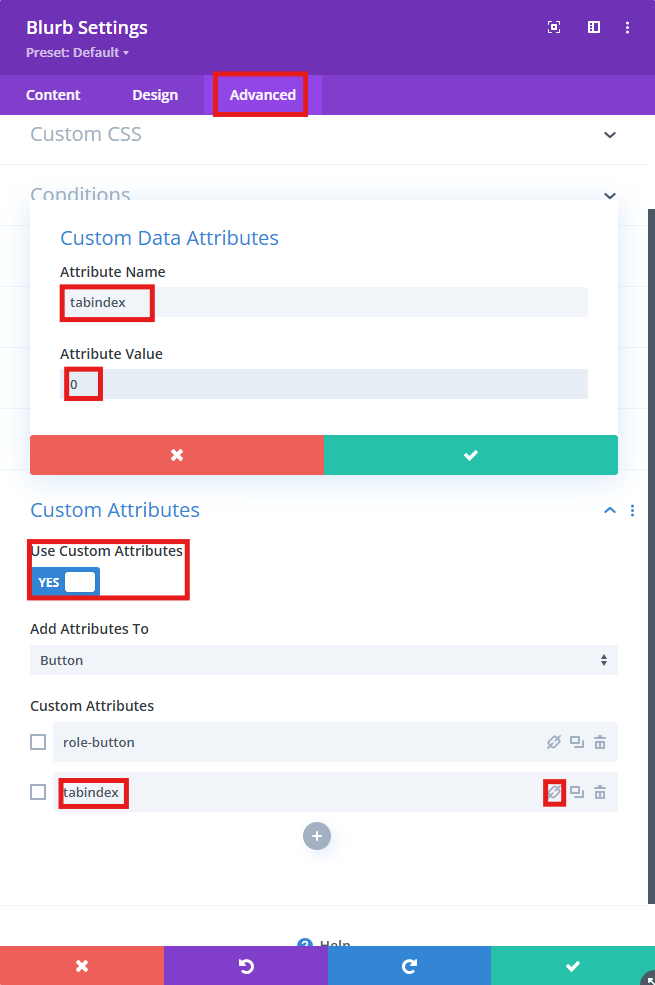
Then we can add the Custom attributes to the element to make it accessibility compliant. We need to add an aria-label attribute, a role = button attribute (done previously) and a tabindex = 0 attribute (done in orientation section):
Special fix for Links using Divi Image Module Images
The above fix does not currently work for Images created using the Divi Image Module. If you want to use an image as a link that opens in another tab currently it is required that you turn the link into a Blurb module. Here is how:
Create a blurb module under your image with blank title and body contents:
The Image & Icon section will also be empty:
Add the link as it appears in the Image module:
In the background section add the image from your Media Library in the background image section:
As there is no actual image to base the sizing of the blurb from we need to specify the size of the blurb:
Then we can add the Custom attributes to the element to make it accessibility compliant. We need to add an aria-label attribute, a role = button attribute (done previously) and a tabindex = 0 attribute (done in orientation section):
There may be other changes like centering and adding a border to make your new blurb image look like your old image but these are the most important changes for making a blurb module look like an image module.
Once all this is done our new access scan should now indicate we’ve tagged everything that opens in a new tab.
![]()
Special fix for Text Links on our Page
If you have a text link on your page, perhaps within a text module, toggle or blurb content you may need to add attributes manually to fix accessibility errors. Typically we might add the following attributes if the link is targeted at a new window i.e. target=”_blank”:
- role=”button”
- tabindex=”0”
- aria-label=”Link opens in a new tab”
If the link target does not open in a new window we can omit the aria-label attribute.
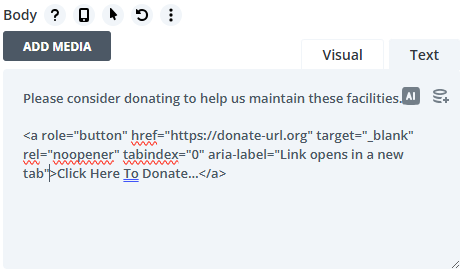
Perhaps a link was created by clicking on the link icon in the Visual tab for adding text content as follows:
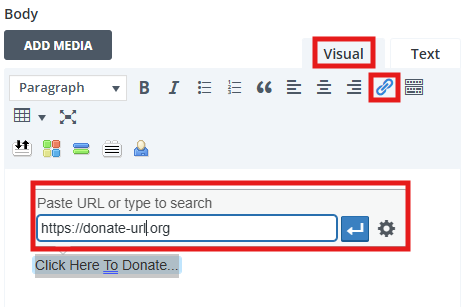
By clicking on the gear icon (settings) we can also make the link open in a new tab. Then if we click on the ‘Text’ tab (see below) we can see the actual HTML.
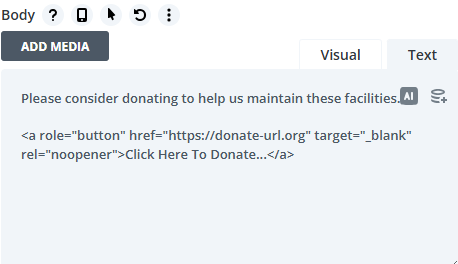
We need to make sure that the <a> element has the appropriate attributes added to it to allow screen readers to navigate to and from the link correctly. So it might look like this:
Titles
Error: Titles built as text tags should be labeled as headings for assistive technology
After clicking on the summary of the issue you may see something like this:
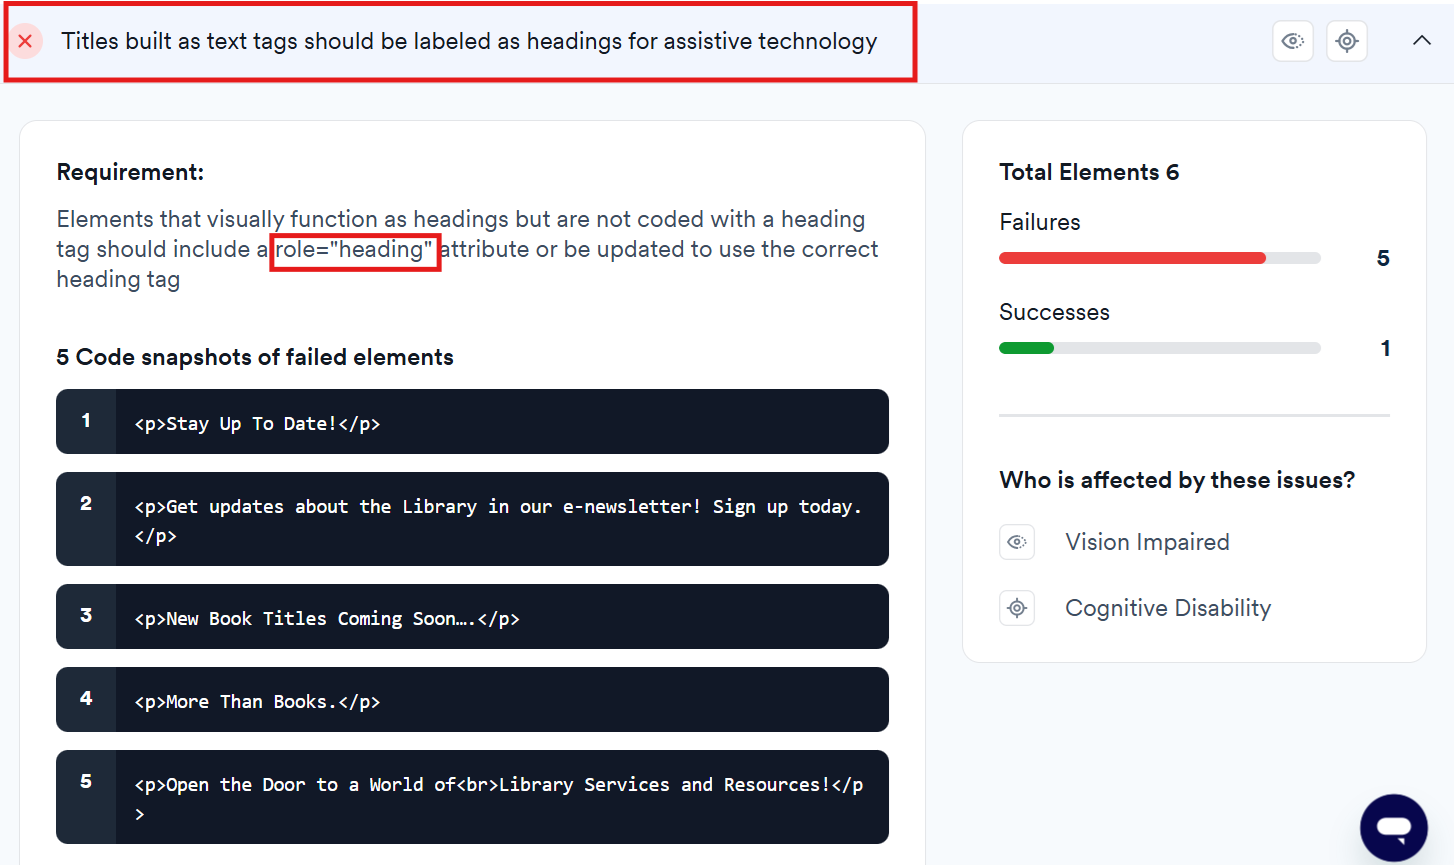
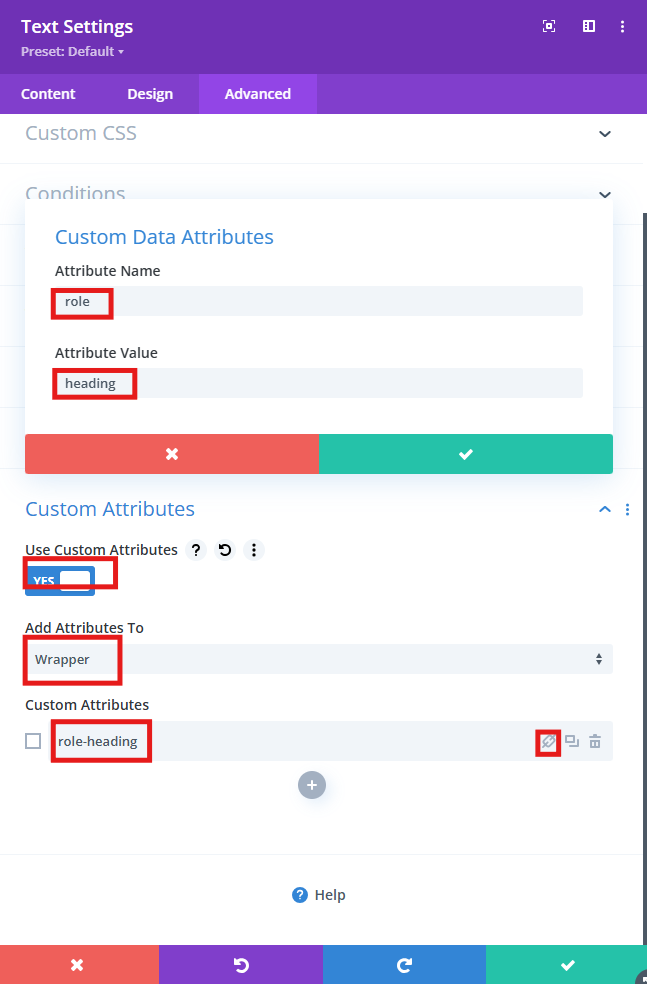
Similar to what we did above we need to find the offending elements but this time adding the role = heading attribute via the Custom Attributes setting:
On scanning our page again we should see that our titles are now labeled correctly for assistive technology:

Orientation
Error: Interactive elements should be navigable using the keyboard
After clicking on the summary of the issue you may see something like this:
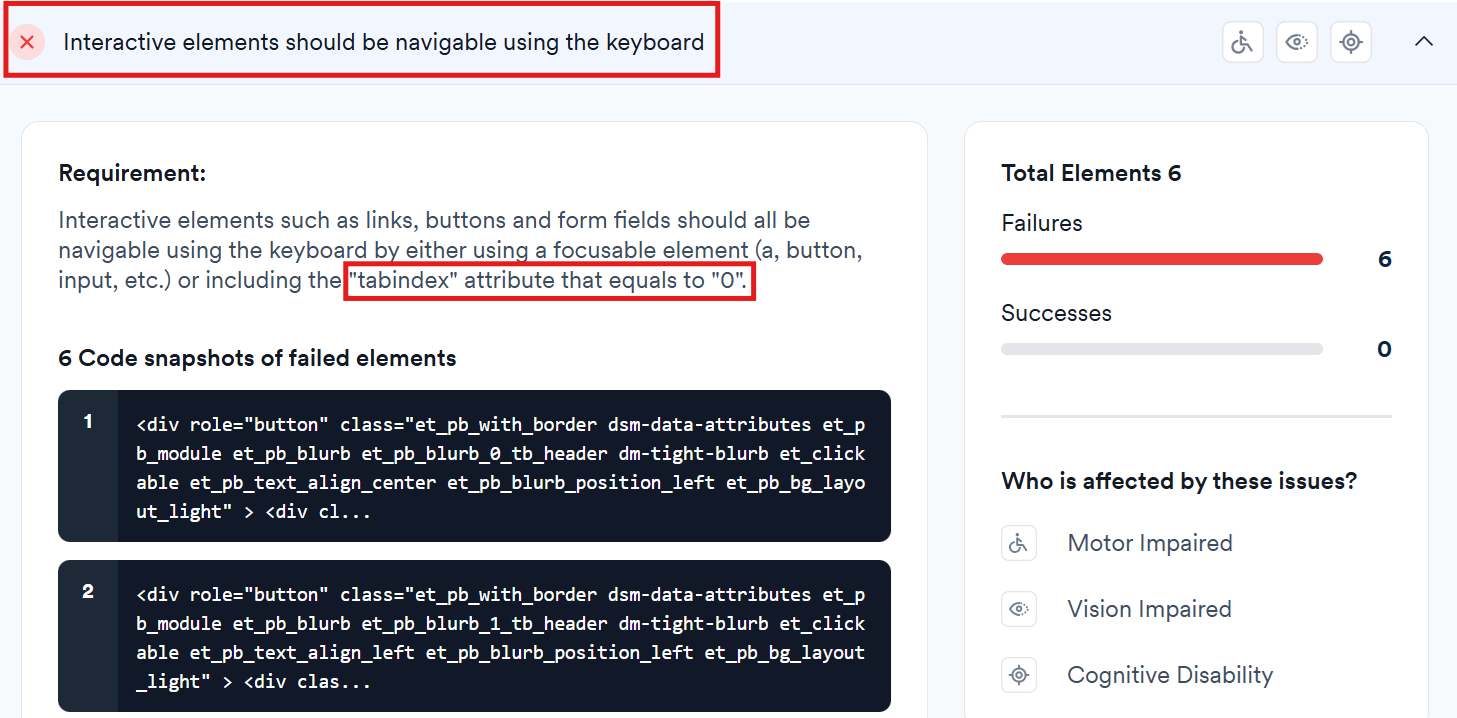
This is telling us that we need to make sure that users who are using their keyboard to navigate to our site need to be able to tab to any interactive elements. We do this by adding a tabindex=”0” attribute using the Custom Attributes section of our module settings similarly to how we have fixed our other issues.
If you think an element does not need to be a part of keyboard navigation you can add a tabindex=”-1” and it will be skipped.
On scanning our page again we should see that our Interactive Elements are now all navigable.
![]()
Error: Every page should include hidden links that allow skipping blocks
After clicking on the summary of the issue you may see something like this:
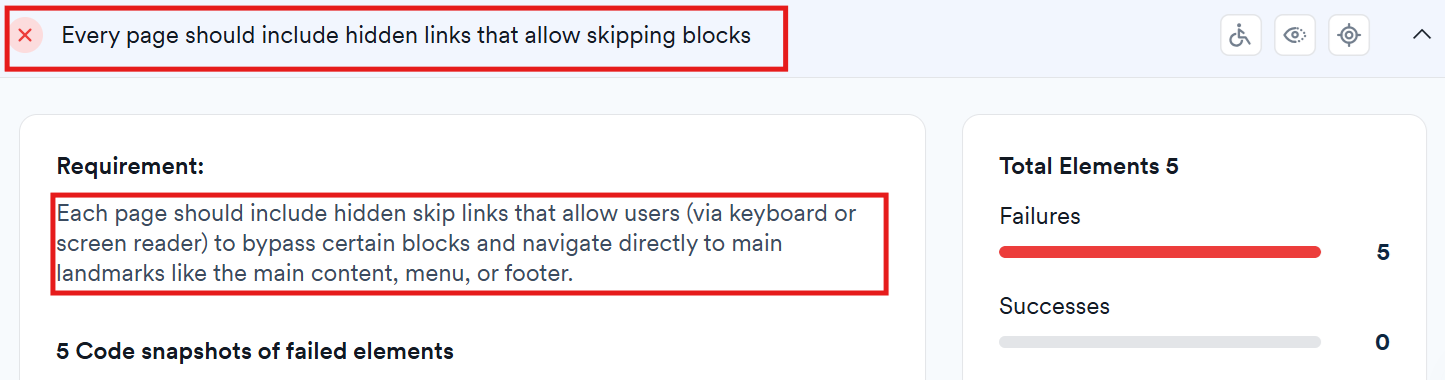
We fix this error by placing some code around to create a skip link past our main header so that users of screen readers don’t have to hear or header and menu information every time.
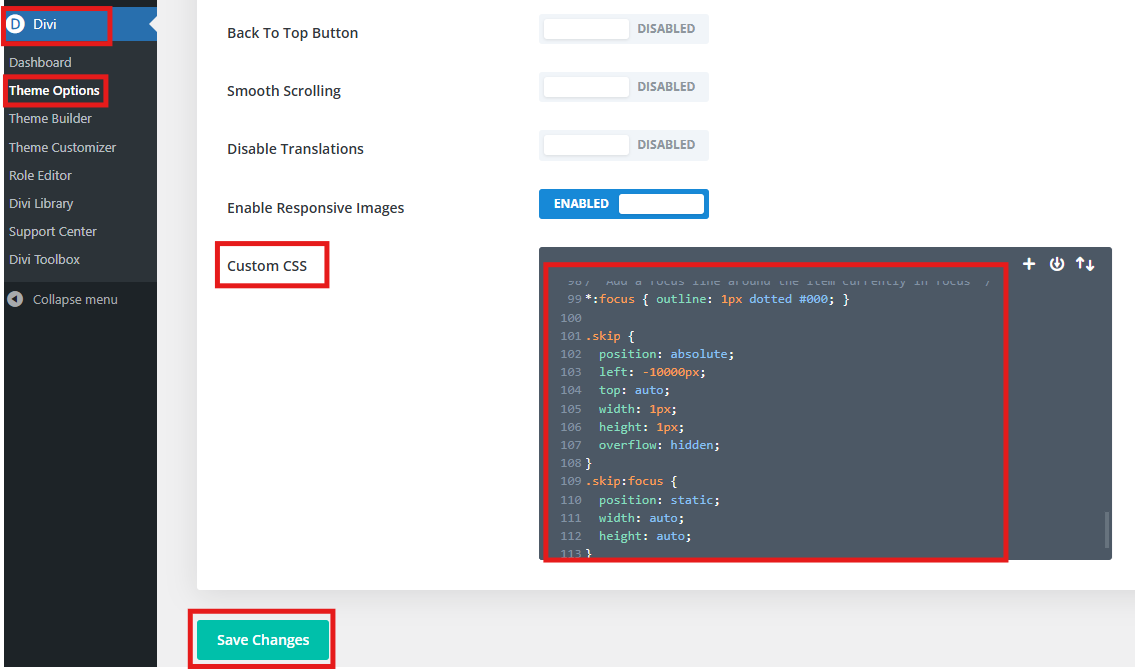
The following code needs to be added to the Divi > Theme Options > Custom CSS section. And don’t forget to click the ‘Save Changes’ Button.
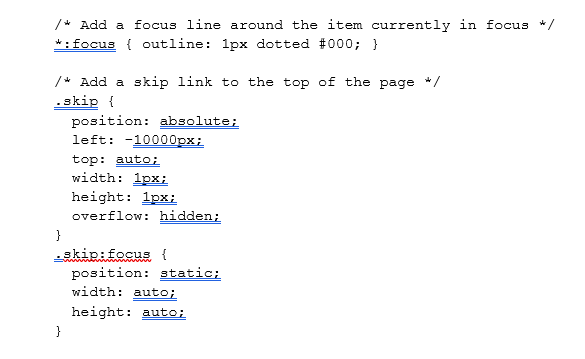
Copy/Paste Code text:
Click here to learn more
This line can then be placed in Divi / Theme options / Integration / < head > code
<a href=”#main” class=”skip”>Skip to main content</a>
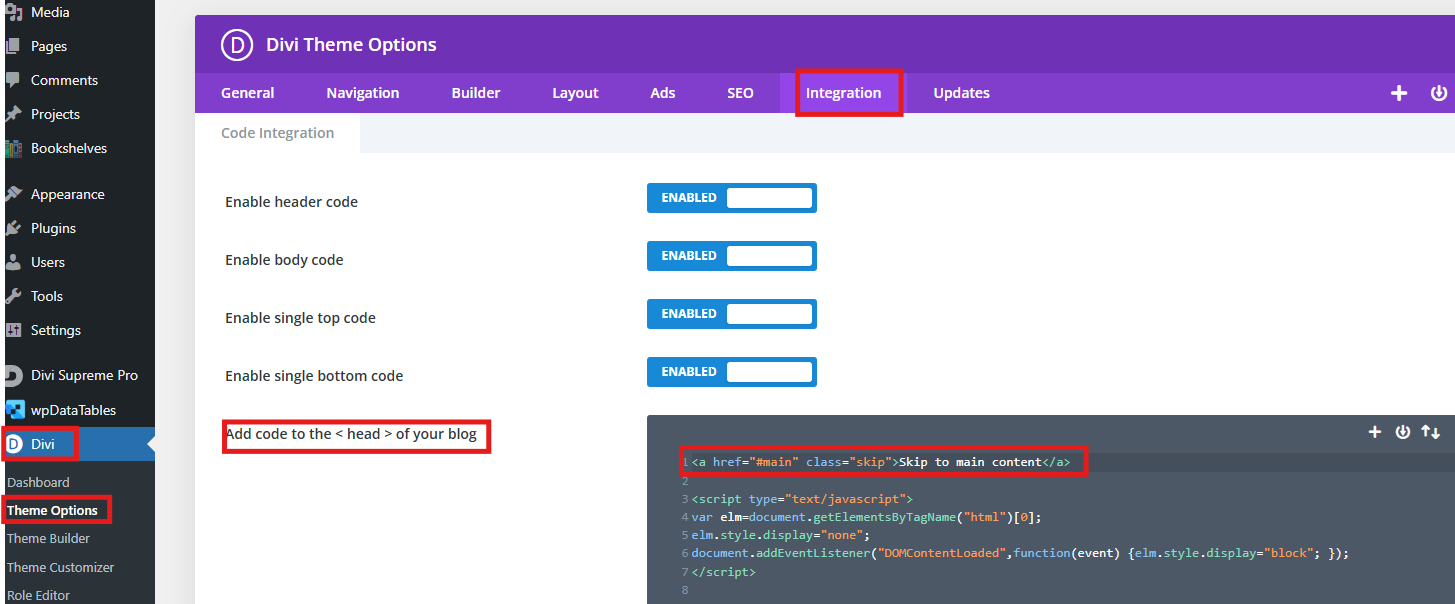
Again, don’t forget to save changes.
Hopefully you have a global template header to place this line of code in, otherwise it will need to go at the top of each page. If you have a global template header it can go in the bottom of that under your menu indicating the start of the main content of the page.
<main id=”main”>
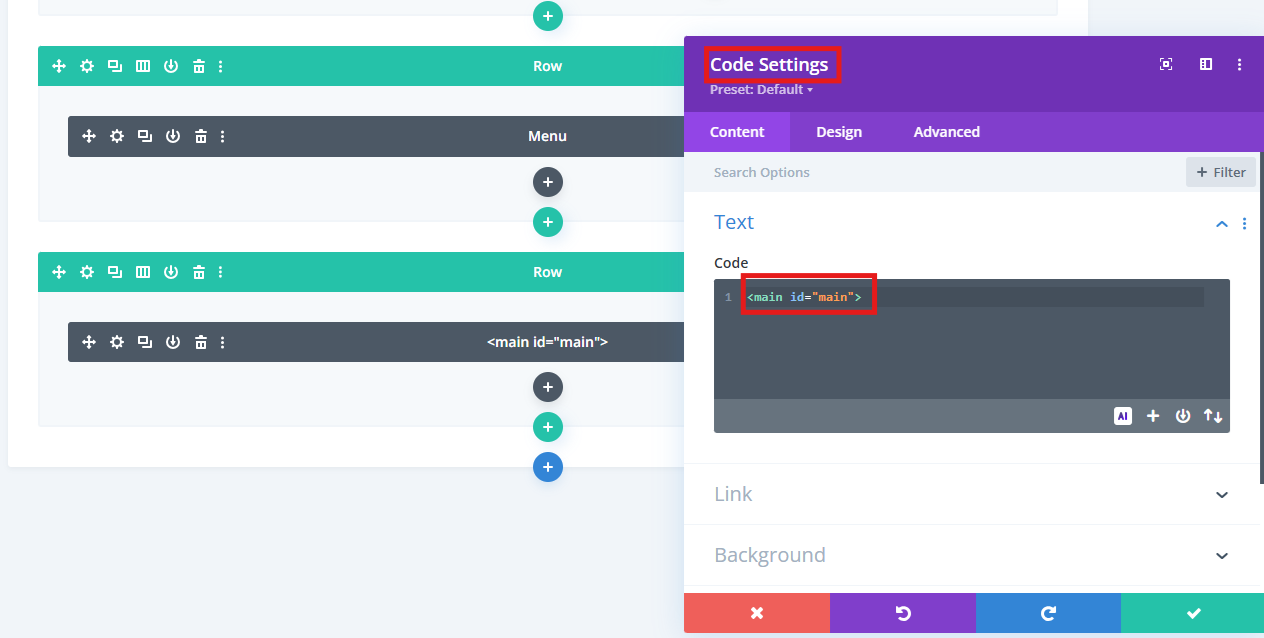
If successful we should see a green tick indicating we now have skipping blocks set up.

3 Menu Errors: Menu dropdowns should be tagged for assistive technology; Dropdown expanded/collapsed state should be represented in the code; Meta viewpoint allows display scaling of at least 200%
The following 2 issues are solved by the same action below:
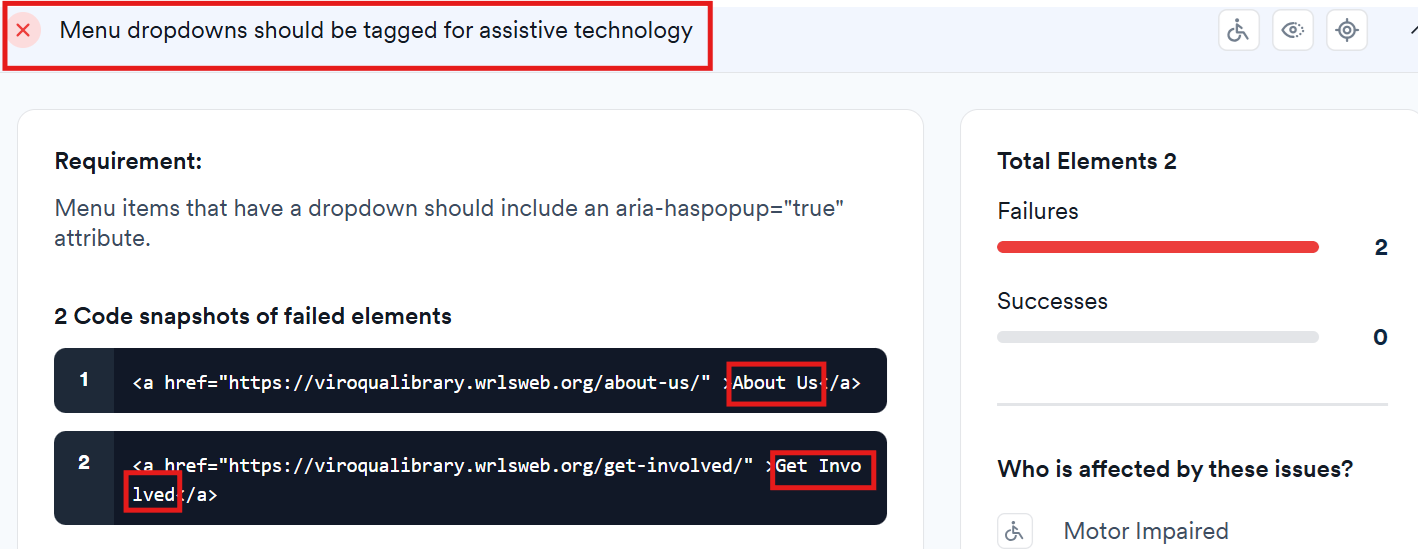

We can see that our menus are causing an issue. For this we need to make a change in our functions.php file. This requires that we have a child theme for our website and the ability to change files on the backend.
While we are at it we can also fix this issue by allowing up to 5X zoom of our pages:
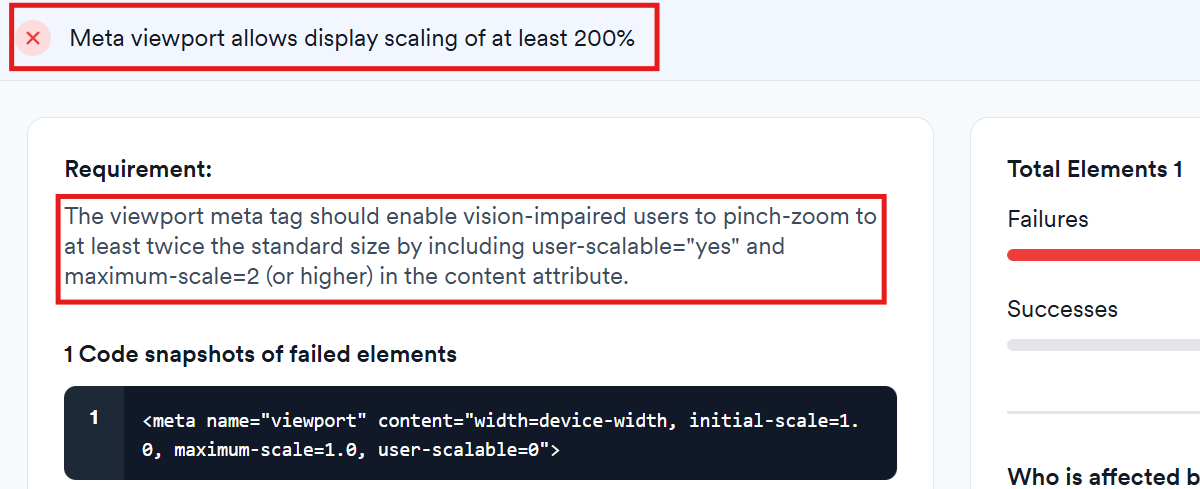
This set of code needs to be placed in our functions.php file:
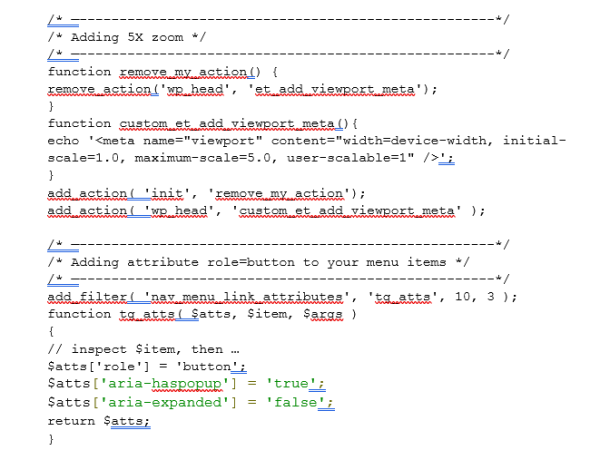
As this requires creation of a child theme and access to the .php file, these issues need to be addressed by LEANWI website staff.
Graphics
Error: Non-functional icons/spacers should be excluded from assistive technology
After clicking on the summary of the issue you may see something like this:
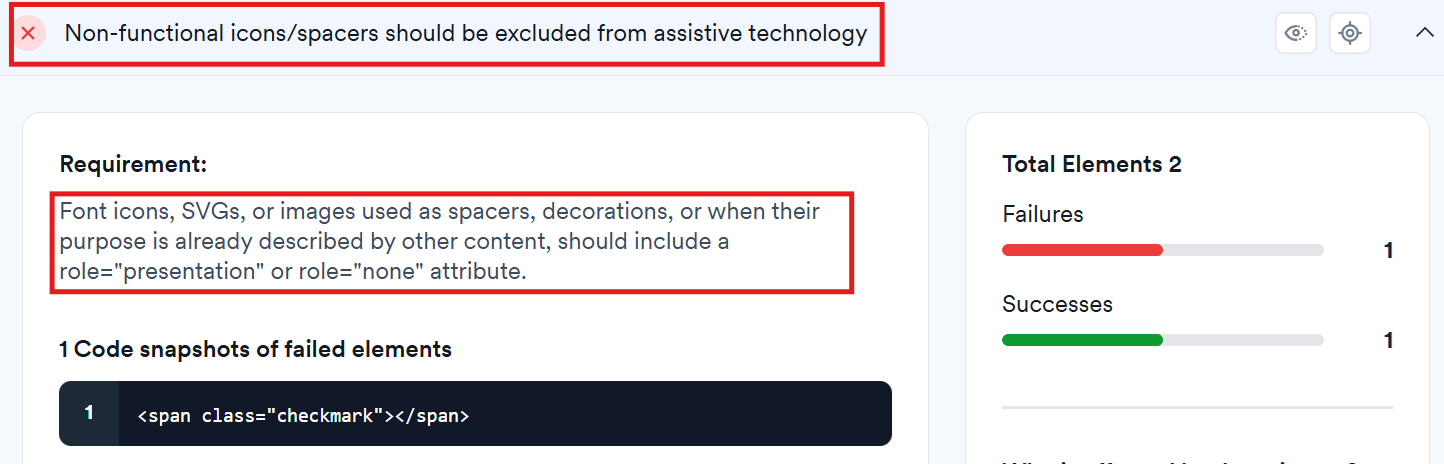
Often, the easiest way to find these issues is to view the page source code and then do a search for a piece of code.
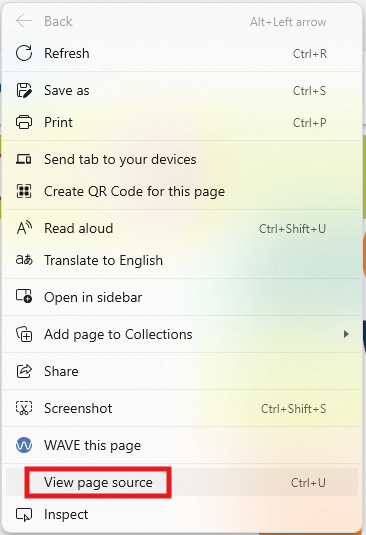
In my case I viewed the page source and then did a ctrl-f and searched for class=”checkmark”. I was able to tell what the element was and I added the role=”presentation” custom attribute to that element.
After completing these steps our access scan should let us know that we’ve been successful:

Forms
Error: Form fields should be properly labeled
After clicking on the summary of the issue you may see something like this:
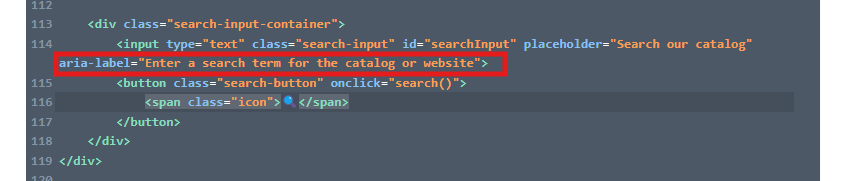
As screen readers are navigating through forms (like a contact form for example) they like to have a label before each input indicating what information the input is requiring. We need to add these labels to our forms if they do not currently exist.
In my case I needed to add the aria-label for a search input I had created in a Code Module:
Finishing - Rescanning your site
Hopefully these changes have gotten you a good way towards making your page accessible. If you are still having problems or have any issues please contact the LEANWI websites staff through our ticketing system: websitehelp@librarieswin.org
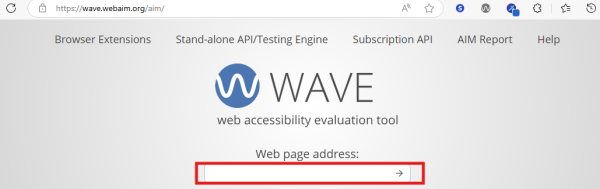
Using WAVE for a final check
The Webaim website accessibility evaluation tool (WAVE) can be accessed by going to their website at https://wave.webaim.org/aim/ and entering in your URL:
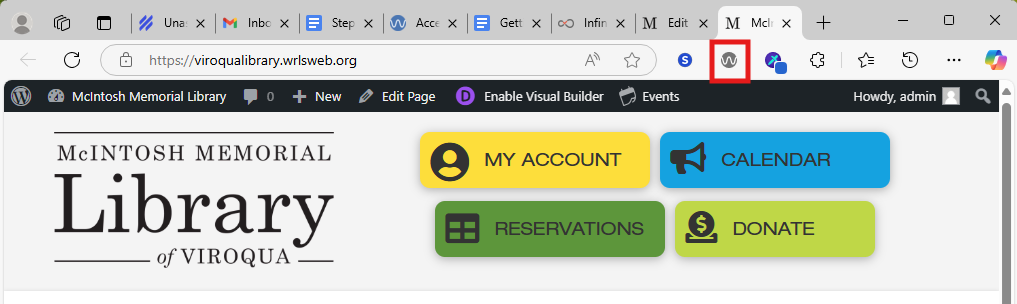
or you can add their extension to your browser and it is simply a case of clicking on that extension when you are on the desired page:
Once WAVE has been activated for your page it has some useful insights. Most usefully at this stage it can point you towards contrast and page structure issues:
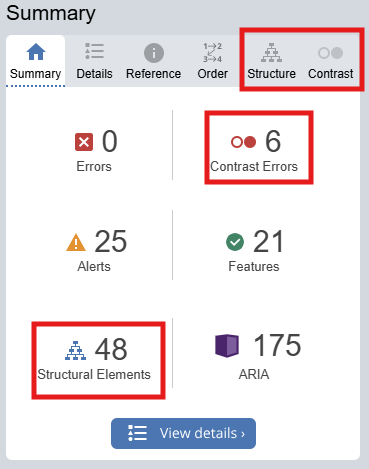
These issues can be investigated further through the Structure and Contrast menu items at the top, or by clicking on the various icons on the page.
It should be fairly easy to determine structurewise if our headings make sense and the contrast information is fairly self explanatory so I will not go into it further here.
A nice tool for comparing the foreground and background contrast and seeing if you can create better contrasting colors is https://webaim.org/resources/contrastchecker/.