
Jump to Video
Understanding the “Styles” function in Microsoft Word is the first key step in creating a structure that allows a screen reader to verbally map a document (Word or as a PDF).
The video below walks through the process of adding and customizing a heading structure for a library board agenda without changing the visual appearance of the document.
The tutorial below focuses on the key steps and checks highlighted in the video for the to improve the accessibility of a document.
Saving a basic document - best practices
Even if you have a very simple document that doesn’t require heading structure and complex styles, there are a few specific steps you should always take when saving a Word documents or a Word document as a PDF.
Adding Metadata
Save As > More Options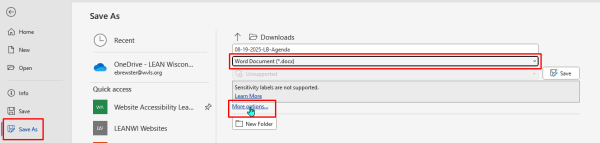
More Options > fill in author and title; Title should be complete, descriptive document title, and not the same as the document “Save As” file name.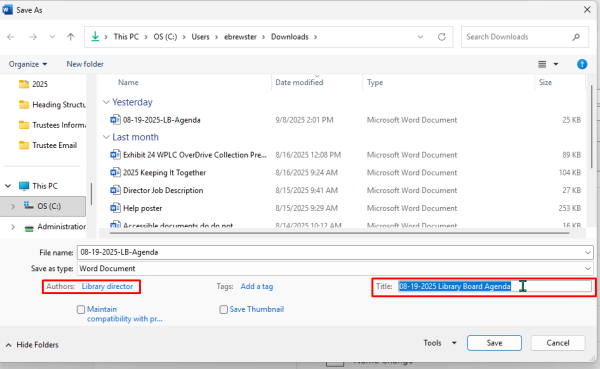
Use a PDF Validator
If you are saving a document as a PDF, use a PDF accessibility checker like PAVE PDF to make essential automatic changes and to check for other errors. Re-download and save the corrected document before uploading to website.
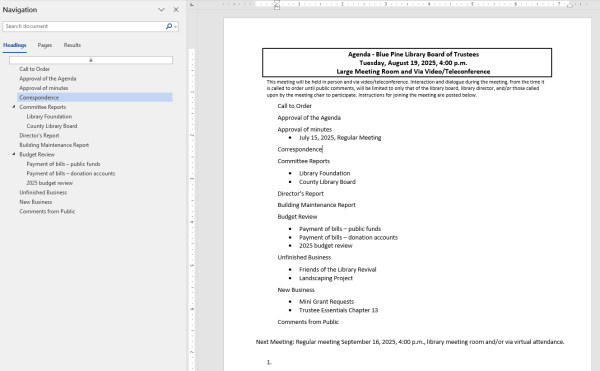
Using Styles to add Headings to a Word document
Intro to Styles
Headings create a navigation structure for machines – specifically screen readers – to help a user of an accessibility tool to quickly “scan” your document and move to the items of interest without needing to listen to the whole document top to bottom.
Headings are created from the Styles menu, located in the “Home” button area of the Word menu ribbon:

The three styles we are most concerned about are:
- Heading (1, 2, 3, etc.)
- Normal
- List Paragraph (bulleted and numbered)
The remaining styles within that context menu are not related to accessibility. Those are only visual formatting tools.
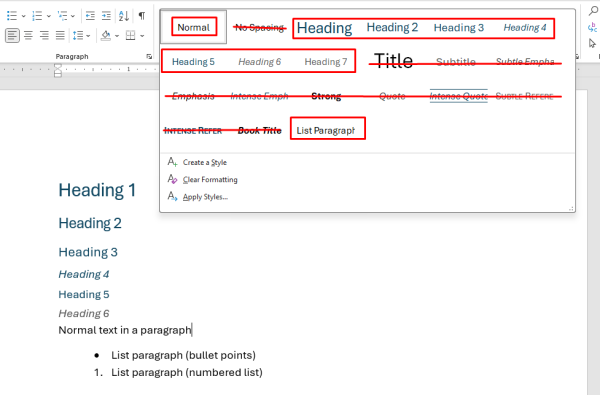
Note: the most distracting item in that list is the “Title” option. In this context, for us
“title” is synonymous with “Heading 1.” We only use a single Heading 1 in our document, and that is the title of our document. (Note, this may not be the exact same, but may be the same, as the title recorded in metadata in the section above.)
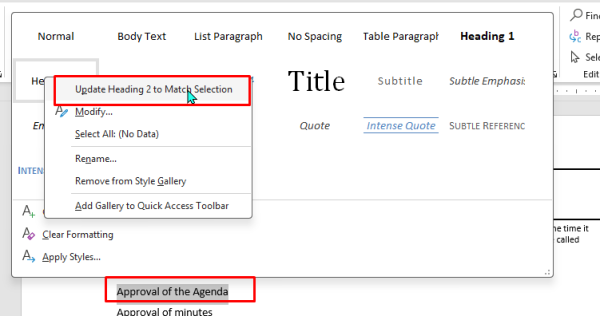
You are not required to use the default Word heading styles. To change the appearance of any of the Styles options without affecting their function, style and select the text you want for the look of the style, then right click on the style option. Select “Update ____ to match selection” and the style will automatically change throughout the document.
For accessibility purposes, use a single Heading 1 as the title of your document, and then you can use as many H2, etc., as needed to create a navigation structure.
View the video below for a step-by-step process of customizing headings to provide navigation and create the look that you like for your document.
Styles Quick-Tips
- Only use one Heading 1 per document (document title).
- Don’t use the “Title” format for the title of your document – use Heading 1.
- Use bullet points for unordered lists (lists where the order of operations doesn’t matter).
- Use numbered lists for lists where the order of the steps is important.
- Don’t use other formatting styles in lieu of headings.
- Do use the “Update _____ to match selection” option to customize the visual appearance of headings.
Better and Better Word Document Practices
Adding metadata, Headings, Normal Text, and proper use of List Paragraph formatting (bullets vs. numbered lists), and alternative text for images are the fundamental elements of creating an accessible document. But there are several additional steps that will greatly improve your document’s accessibility and are best practices for both general copy editing and typesetting as well as improving screen reader function.
Removing extraneous characters
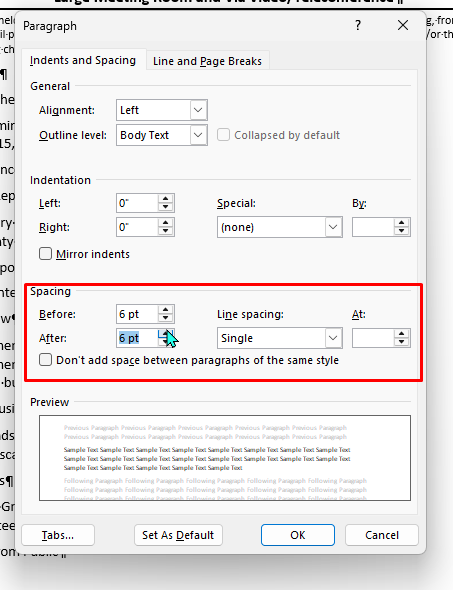
Correctly adding spaces between paragraphs of text
To view hidden characters, click on the paragraph symbol in the Paragraph menu in the Home toolbar in the ribbon.


Do not use the “Enter” key to create spaces between lines of text.
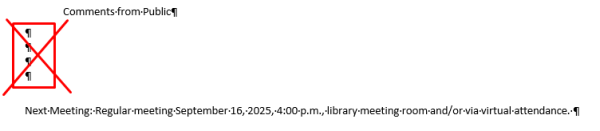
Do use the “paragraph” formatting tools to add space before and after text.

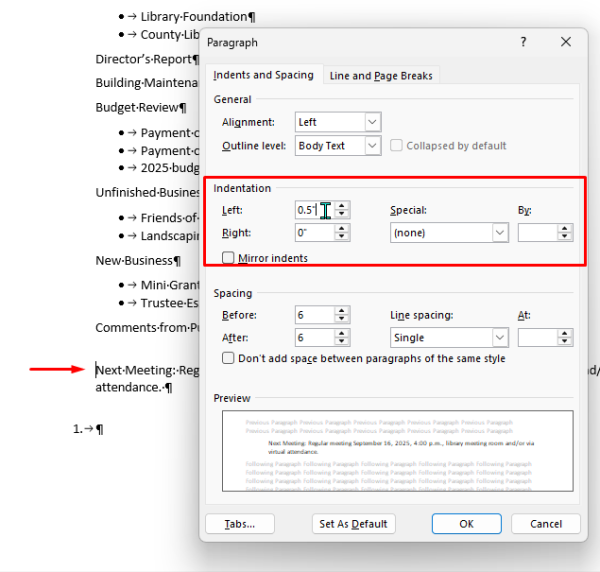
Indenting appropriately
Do not use the space bar to increase the indent on a line of text.

Do use the “tab” key

or paragraph indentation function.
Video timing highlights:
3:30 Viewing the Word Accessibility Checker (note: Google Docs were NOT covered in this session)
5:20 Saving a basic Word document with metadata as a PDF and checking with a PDF validator
13:25 Adding headings to a Word document with the “Styles” function to create a navigable document structure
33:20 Removing extraneous hidden characters (returns/pilcrows, spaces in place of tabs) to improve document accessibility