
Jump to Video
Introduction
Once you begin be comfortable with using SharePoint to create and link documents on your website, there are some additional features that can enhance your workflow and experience.
NOTE: each library will need to request access to their own individual SharePoint website document repository and specify the user account that will have access to add, edit, and remove documents. To request your SharePoint document repository, email websitehelp@librarieswin.org.
Map/Pin a SharePoint folder to Your Windows File Explorer
Maybe right now you have a link to your SharePoint website document repository bookmarked in your browser and you return to that to find the file or folder you want to work with.
But wouldn’t it be nice to treat your website files just like any other document you work with on your computer and not need to open a browser to do it?
Well, you can!
Note: it is helpful if you are already comfortable and familiar with organizing documents in different places on your Windows computer and if you have had some experience using OneDrive.
Add SharePoint Shortcut to OneDrive
First steps:
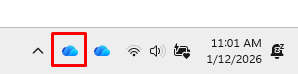
- You must be signed in to OneDrive with the same account you use for the SharePoint document repository on the computer you want to pin the folder to File Explorer in. To know if you are signed into OneDrive, look for the blue cloud in the taskbar:
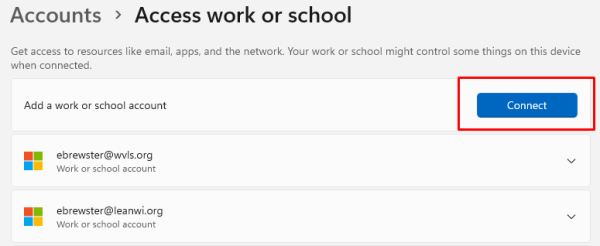
- To connect a OneDrive account on your computer, go to Settings > Accounts > Access Work or School and click connect and enter the credentials for the account you use for SharePoint.
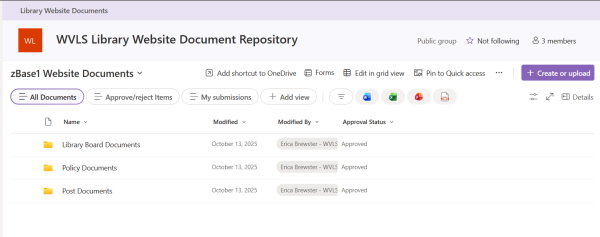
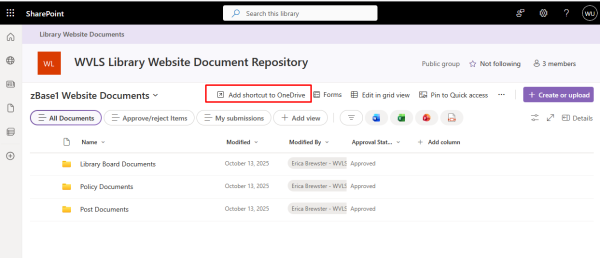
- Sign into your browser and view your SharePoint document library. When you are signed into the browser, you should see a view similar to this:
The goals is to make this folder – or one of the subfolders – appear in your Windows File Explorer.
SharePoint makes this easy with a click of a button.
In the web browser, click on the “Add shortcut to OneDrive” in the upper menu.
You will see the confirmation pop up at the bottom of the screen.

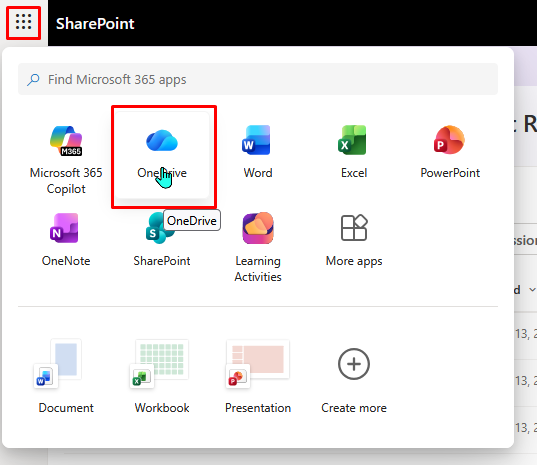
To confirm that the pinning worked, navigate to your OneDrive in the browser by clicking the grid in the upper lefthand corner of the screen and selecting OneDrive.
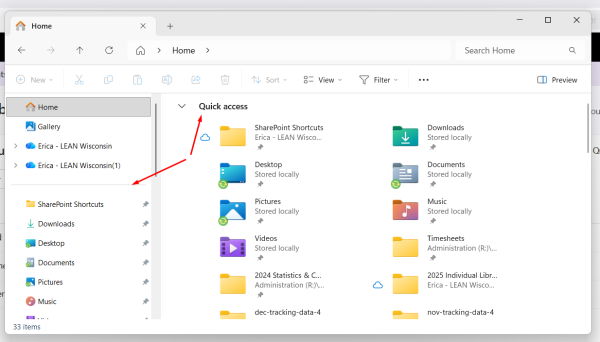
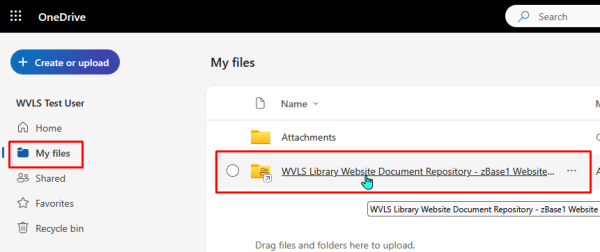
In your OneDrive landing page, select “My files” from the lefthand menu bar. In “My Files,” you should see the shortcut to your SharePoint document library in the list of folders.
Now, if you open your File Explorer on your Windows computer and open your OneDrive dropdown, you will see that same shortcut linked in your File Explorer side bar.
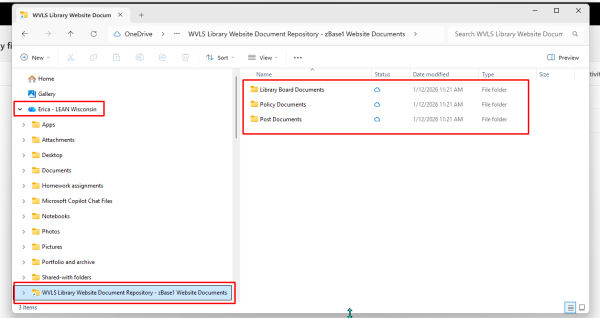
You can now create, delete, move SharePoint files between folders, and open to edit in desktop applications. These files and changes will automatically sync back to the SharePoint document library online.
Remove SharePoint Shortcut from OneDrive
You can also easily remove the SharePoint shortcut.
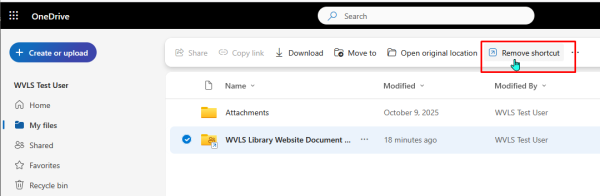
Option 1: From the browser: select the folder shortcut you want to remove and click on “Remove shortcut” in the ribbon menu.
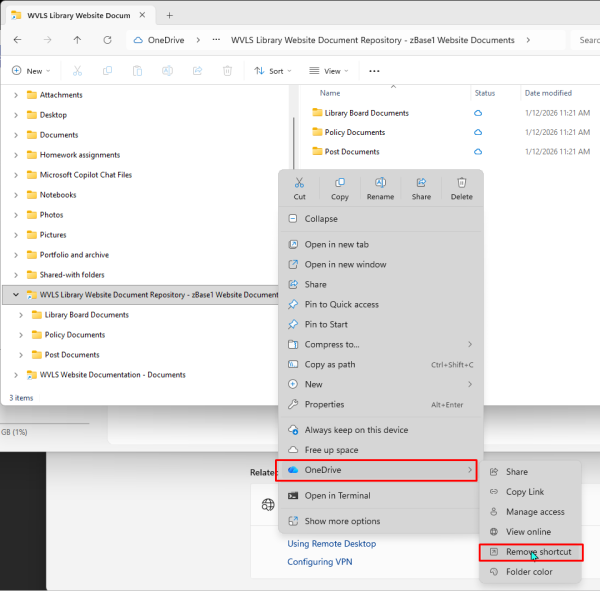
Option 2: In File Explorer, right-click on the document library in the right side bar, click on “OneDrive” in the dropdown menu, and select “Remove Shortcut.”
(It may take a moment for changes to refresh.)
Edit SharePoint documents in Desktop applications
Prerequisite: You must have an Microsoft 365 A3 license which allows syncing of OneDrive documents to File Explorer and use of full Office Desktop applications signed in with your email address that you use to access the SharePoint repository in order to create/open/edit SharePoint documents in desktop apps on your computer.
To edit a SharePoint document you have two choices: use Office 365 applications (e.g., Word) in your browser or open the document in a Desktop Application (see prerequisite caveat above).
You can see these options by navigating to your document in SharePoint in your browser, right clicking, and selecting “Open” in the shortcut menu. There you will see the options to “Open in browser,” or “Open in app”.
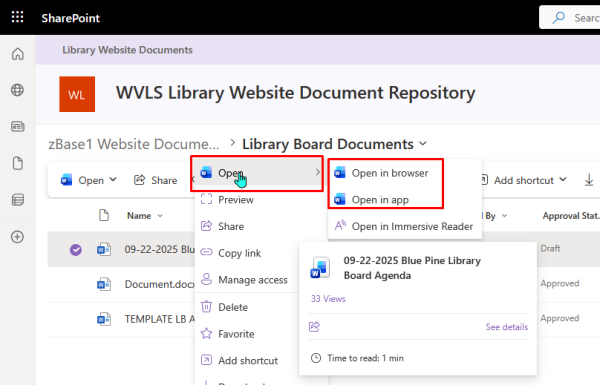
Note: if you open and edit in the browser, you may notice some more advanced features are missing. To have access to full list of menu items. you will need to open and edit documents in the desktop application.
Any changes you make to a document you are editing in the desktop application will automatically sync to the SharePoint repository.
Caution: this also means that if this document has already been linked to your website, live changes will appear on your website. There may be options in the future to create “draft” publication versions to edit later, but for now all changes will appear live.
Link SharePoint file to website from File Explorer
Once you are ready to public a SharePoint document or folder to your website, you can get the shareable link either from the browser or from File Explorer.
In browser:
Simply right click on the document or folder you want to link to and select “copy link”.
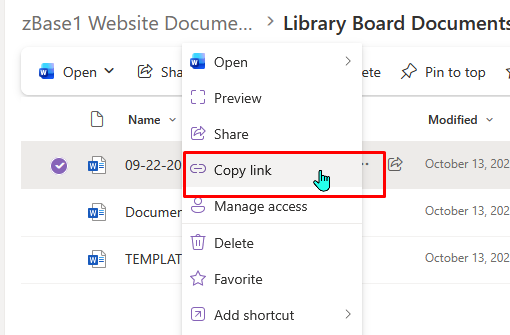
A “Link Created” dialogue will open. Make sure the settings option says, “Anyone with link can view.”
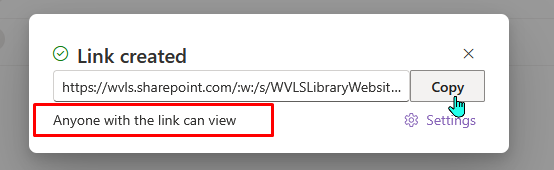
Paste this link into your website.
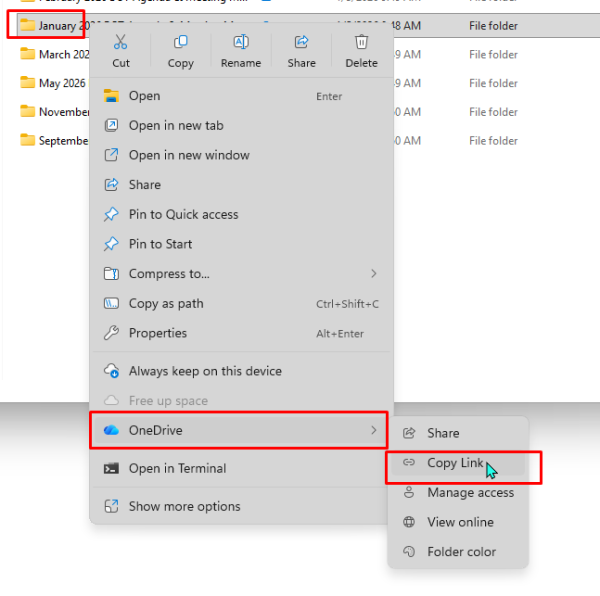
In Desktop (File Explorer):
Very similarly, you can create a link for your website in File Explorer by right clicking on the file or folder you want to share and selecting “One Drive” from the shortcut menu. Then click on “Copy Link.”
As above, make sure “Anyone with the link can view” appears in the dialogue box.
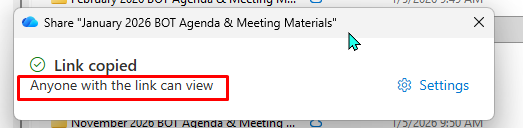
Note: there is no “copy link” option here as the link has been automatically saved to the clipboard and can be directly pasted into the destination.