Jump to Video
Terminology:
- WordPress is the website publishing platform that all Libraries Win websites are built on.
- Functions like the Media Gallery, basic Posts, Appearance, Plugins, Settings, etc. are managed out of the WordPress Dashboard.
- A theme is a basic layout used to organize graphics and text on your website. Think of it like a template in Canva or Publisher.
- Divi is the “theme” we use to add content to our website – but it is more than a graphic layout. It is truly a “builder” that translates website code (HTML and CSS) into visuals that are accessible to those of us who haven’t studied coding or computer/web languages.
- Even though it is easier to understand the visual representation Divi provides, there is still a learning curve to understanding how to interpret and interact the modules and settings in order to make a webpage do what you truly desire.
- Module is the fundamental building block inside which all Divi content is contained. There are different modules for different functions (images, text, specialty code, etc.). A module is visually indicated by a black box.
- A row is a container for multiple modules. A row can be subdivided into different proportions to allow different sized modules within a space. A row is visually indicated by a green box.
- A section is a container for multiple rows. A section is visually indicated by a blue box.
- Back End Builder (standard builder) is the Divi builder located within the native WordPress page editor. This view organizes information into the standard Divi Section, Row, and Module blocks, but it does not show the graphics and text that the public will see on the front end.
- Front End Builder (visual builder) is the Divi editor that lets you see the webpage as it would (mostly) appear to the public while you edit it.
Divi Builder Basics
In brief, Divi works by breaking the large Page editor box in WordPress into smaller chunks, which allows you to arrange text, images, or other content in a controlled, manageable way. If you ever tried to create a newsletter or poster in Microsoft Word and then started using Publisher or Canva with its modular layout features, you can begin to understand the advantage of using Divi over a blank WordPress canvas with it’s very primitive layout tools.
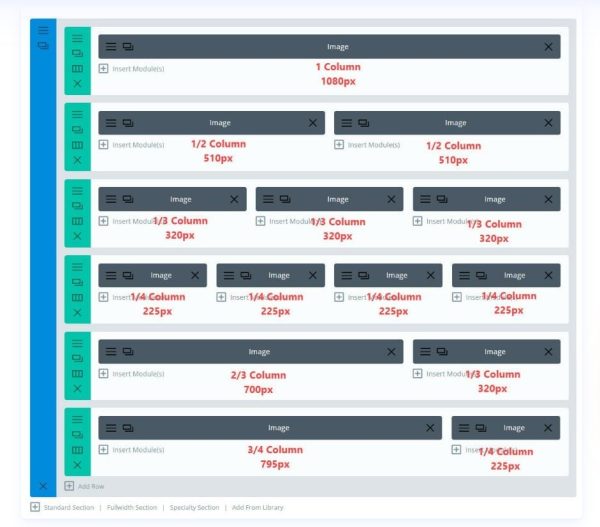
Here’s a visual breakdown of how Divi divides up the editor box into proportional modules – this example uses image modules, but it applies to any type of module you use.
Backend and Front end editors
First thing to understand is you can add, access, and edit the same content on the “back end” or the “front end” using the Divi editor. Example:
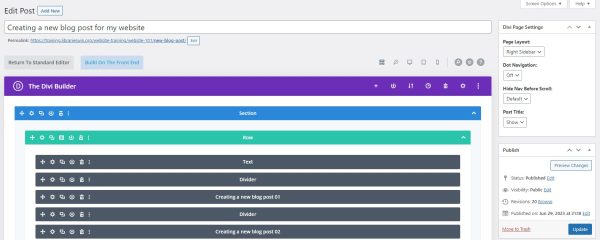
“Creating a new blog post for my website” – back end editor view
“Creating a new blog post for my website” – front end editor view
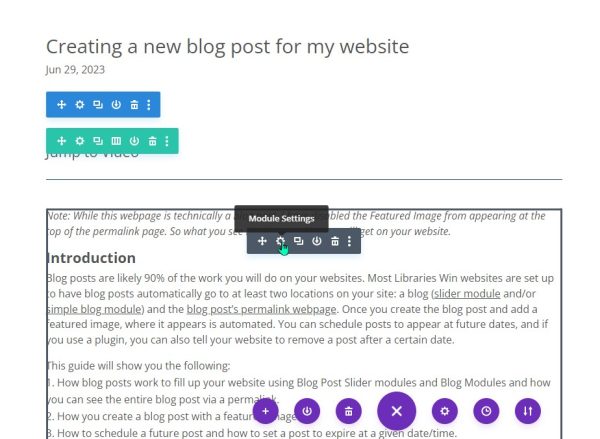
The back end appears as all blocks; the front end has several paragraphs of text and the blue, green, and black outlines of the sections, rows, and modules appear and disappear as you mouse over the areas. In the above example, the green row is not divided horizontally, so all the black modules are full-width across the page and are stacked vertically on top of each other.
Comparison: modules on the backend vs. front end editor views
Now let’s view an example where the page is divided into multiple types of modules of various sizes.
First, this is the back end editor view of the Chippewa Falls Teens webpage.
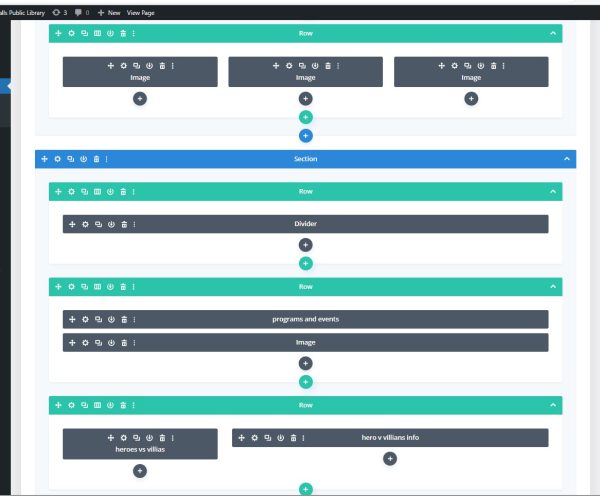
Note how the left-hand image shows
- a green row containing three black modules, each 1/3 of the full width;
- a new blue section with a green row with a full-width divider;
- a second green row two full-width modules;
- and a third green row with two modules, one 1/3 of the width and the second 2/3 of the full width.
This is what the same content looks like on the live or front end view of the page.
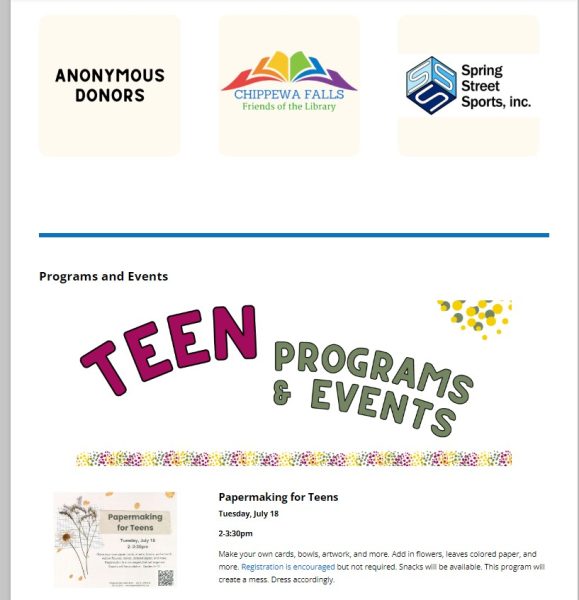
On the right-hand side you can see how the blocks of information appear visually:
- three images with donor names,
- a blue full-width divider,
- a title “programs and events” text and “Teens Programs & Events” graphic image,
- and a 1/3 width blog image plus 2/3 blog text.
One way to improve translation between the front and back end is to use the white text in the black modules on the back end to label the content of each module. This is called an “Admin Label” and is only visible on the backend editor but can be very helpful in knowing both the type of module and the content of that module. Any text can be entered.
Now it’s yours to play with! Once you have a page to work with, add a section, add a row with space for modules per your chosen widths, and add content to those module spaces – and voila! You have your own newly designed webpage.
The videos below demonstrate the next steps in the process: